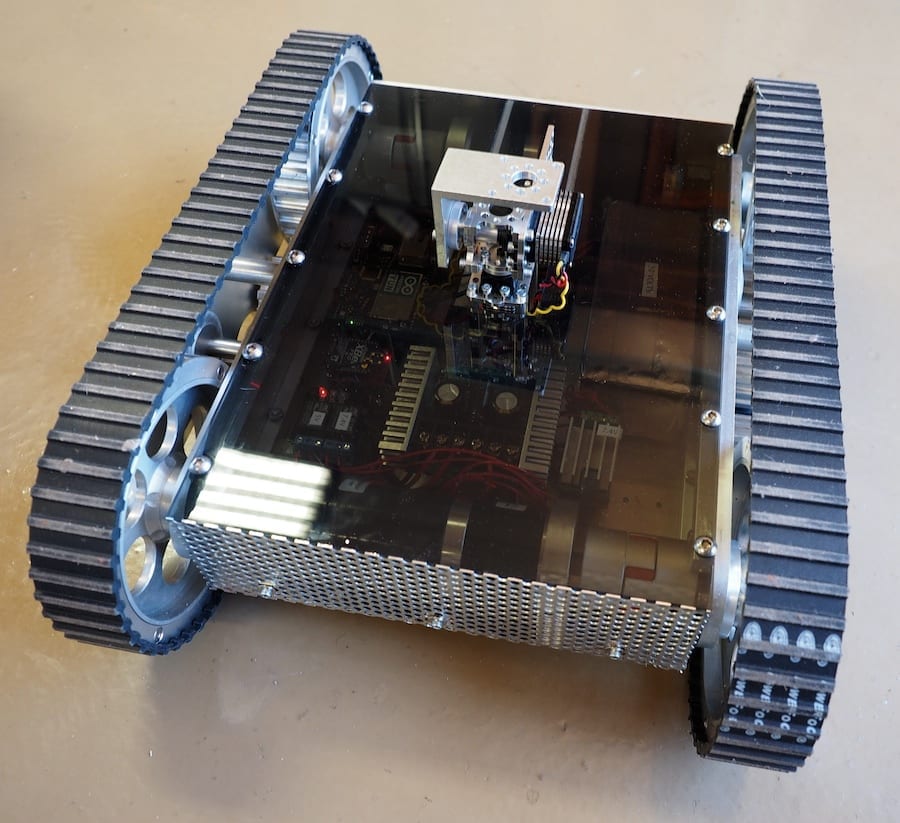
We are working on a tank with treads and a laser cannon gun turret. It’s a complex, long-term project with lots of CNC-machined parts as well a a variety of purchased components, but we’ve been making good progress on it. Today’s posting will focus on the base, which holds the electronics, provides mobility, and establishes a sturdy platform for the gun turret (not shown here).
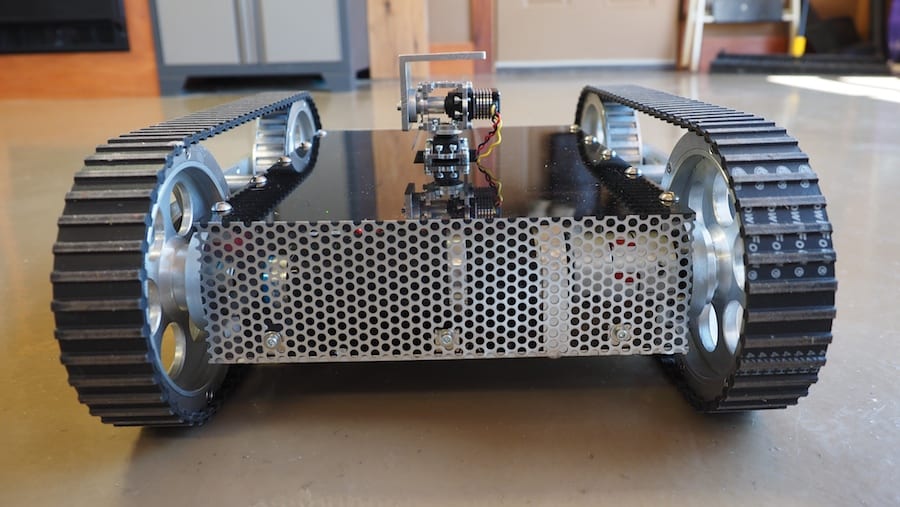
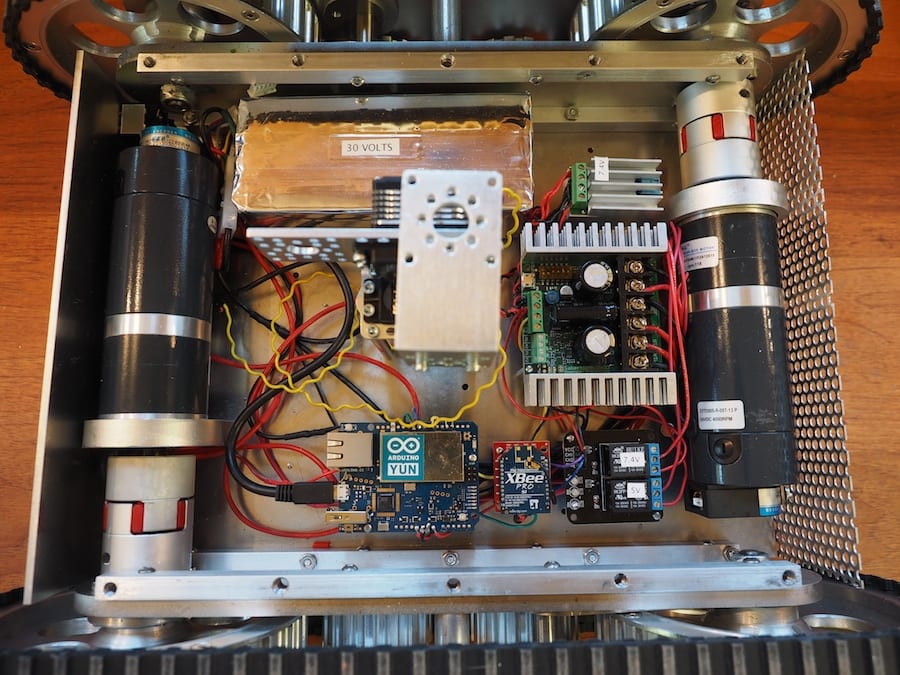
The robot is powered by a large 8-cell 30 Volt LIPO battery, our first ever. So we’ve got lots of power for the motors and the laser cannon. We are driving the wheels (which are actually timing wheels) with two beefy gear motors and a Sabertooth dual 32-Amp Motor Controller. The treads are timing belts. There are two machined aluminum plates (separated by standoffs) on each side that provide the mounting for the wheels. We are using an Arduino Yun for the first time in this robot, which is a new microcontroller that integrates Linux and Arduino into a single board, which among other things, provides for a nice wifi layer, including WiFi-based software updates. We’re using an AnyVolt voltage regulator to bring some of the 30V down to 7.4V for the gun turret servos and the laser cannon. And we have a second voltage regulator for the 5 volt components. The Arduino will trigger relays (shown) to turn on the four targeting lasers and the main laser cannon (not shown), which will laser-burn targets using an autonomous targeting system. This photo also shows the four multi-tapped rails that we made to hold the robot together, including the track sub-assemblies on each side, the bottom plate, and top plate. The front plate and rear plate are held onto the bottom plate with six small #6-32 angle brackets. To better visualize the scale of this robot, the bottom plate is about 10″ wide and 13″ long.
The CNC-machined back plate includes the main power switch, a USB jack for programming (although we’ve been using the Yun Wifi for that), banana plugs for charging, and a fuse.
There are many things we like about this robot so far, but we were especially pleased with the smoke-gray acrylic top that we machined on our CNC. It’s transparent enough to see the circuit board lights on the electronics, but opaque enough to give it a nice blackish sheen. The main top plate is held onto the rails with a bolt pattern of ten 1/4-20 bolts. The difficulty with gun turrets is that you can’t get the top plate off the base without removing the gun turret, which is a pain, so we machined a slot into the main top plate. We didn’t want to use fasteners or a hinge on the acrylic, so we machined mating shelves (grayish area along the edge) so that the small back plate press fits perfectly into the top plate and stays there without needing any fasteners.
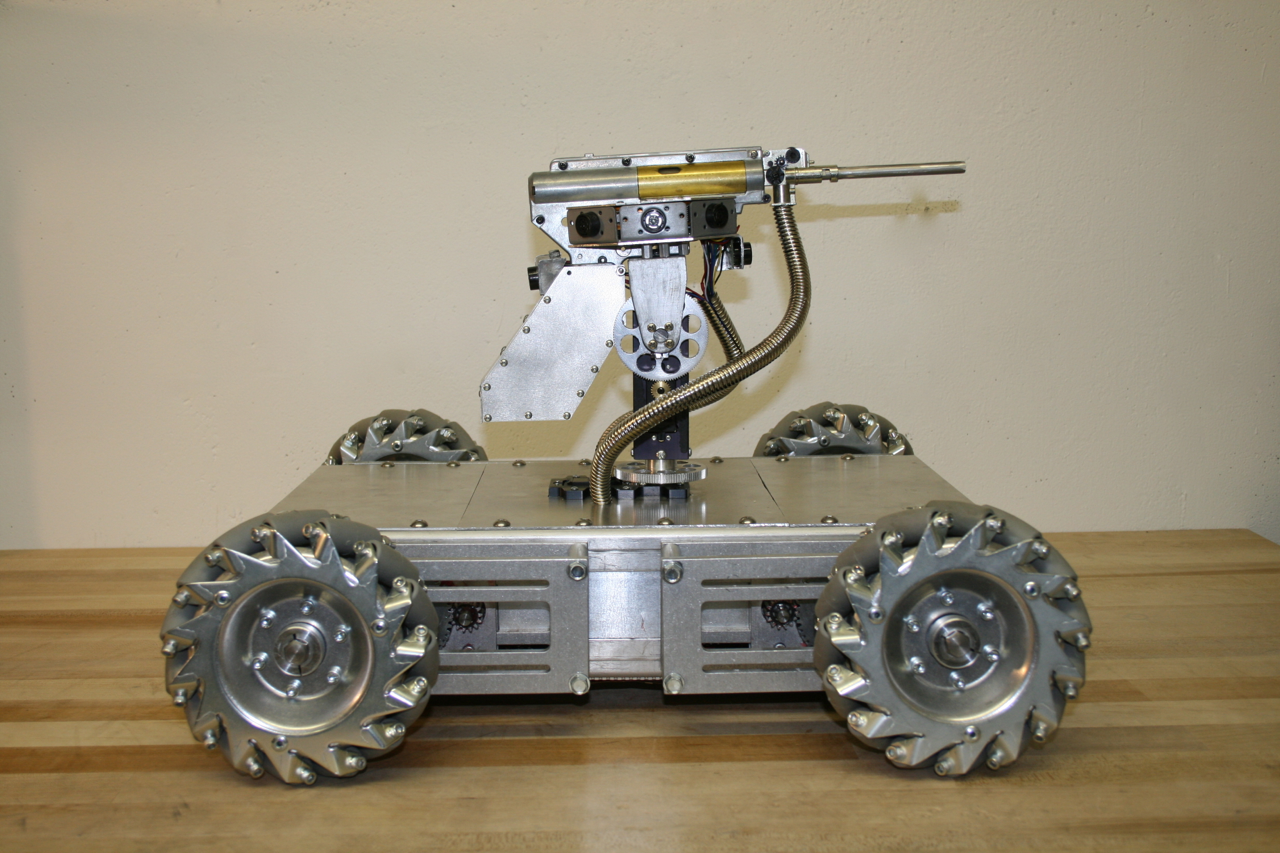
We would like to introduce Mechatron, our mechatronic tank. When we designed and built Mechatron we wanted him to be tough looking, industrial, and retro-futuristic, with lots of metal, rivets, and gears. He’s built entirely out of aluminum, brass, and steel, but inside, he’s chock-full of high tech electronics. See pictures and more text below. And be sure to watch the video to see Mechatron in action!
Mechatron includes special wheels with rollers slanted at 45 degree angles and driven by dedicated gearboxes, four powerful motors, and a software-controlled drive system that we wrote that operates each of the wheels independently. The result is that he can move in any direction at any time in any orientation. In other words, he can drive forward and backwards or turn like a normal vehicle, but he can also drive perpendicular to the direction he’s facing or at any desired angle. Weighing in at forty five pounds, he is by far our heaviest robot, but he is also our most agile, which makes him tremendous fun to drive.
Mechatron’s gun turret pans 360 degrees, includes 8 range-finding sonars for target detection, a laser, and a high-powered electric automatic weapon that shoots brass or plastic pellets. Ammunition is fed from the base of the robot up through one of the articulated metal tubes attached to the turret (the other tube contains wires). He can fire extremely rapidly while standing still or moving.
Strips of 52 programmable RGB LED lights have been mounted on Mechatron’s underside and within his turret. The turret LEDs indicate the robot’s current mode and whether the weapon system is armed. The LEDs on the underside change color depending on the direction of each of the individual wheels (Blue = Stopped. Green = Forward. Red = Backward), which helps to illuminate how Mechatron’s unique drive system works.
Mechatron is designed to function in a variety of different modes, including both user-controlled Radio Control and/or fully-autonomous. For the RC mode, we built our own controller which matches Mechatron in look-and-feel. The left joystick controls the pan and tilt of the gun turret and includes the firing button on top (which is armed using the missile switch). The right joystick controls the drive system. Forward and Backward motion (Y-axis) moves the robot forward or backward. Twisting the joystick turns the robot in the direction of twist (Z-axis). Moving the joystick left or right (X-axis) causes the robot to strafe left or right while maintaining his current orientation. Combined X-Y-Z joystick motions create unique and agile movements, such as strafing in circles. The robot can move in any direction, while panning and tilting its turret and firing all at the same time.
Technical Specifics:
Overall Design: Beatty Robotics
Arduino Software: Beatty Robotics
Metal armor plates: Beatty Robotics
Main Microcontroller: Arduino Mega 2560
Microcontroller used for controlling LED lights: Arduino Nano
Light Controller Software: Beatty Robotics
Wheels: AndyMark (special thanks to Andy Baker, who was great to work with on these)
Drive Gears: Modulox (special thanks to Dan Richardson at iR3 Creative Engineering & Andy Baker at AndyMark)
Pan-Tilt gears and other parts: RobotZone (special thanks to ServoCity)
Pan-Tilt Servos: Hitec Digital
Sonars: (12) Maxbotix MaxSonar Ultrasonic Sensors
Turret Sensor Head: Beatty Robotics
RGB LED strips: Adafruit (Go Blinky Belt!)
MP3 Sound Board: Sparkfun MP3 Trigger
Servo Controller: Pololu Maestro
Voltage Regulators: Pololu & Dimension Engineering
High-amp Relays: DFRobot
Motor Controllers: (2) Dimension Engineering Sabertooth 2×25
Motors: (4) CIM
Wireless Communication: Xbee Radio with Sparkfun Xbee Explorer Regulated board
Joy Sticks: (2) 3-axis hall-effect joysticks from CH Products
Batteries: (1) 12v 3-cell Lithium-Polymer 20C
Aluminum, hardware, fasteners, wire, tools, and much else: McMaster-Carr
Wire, electronic components, IC boards, and much else: Sparkfun & RobotShop
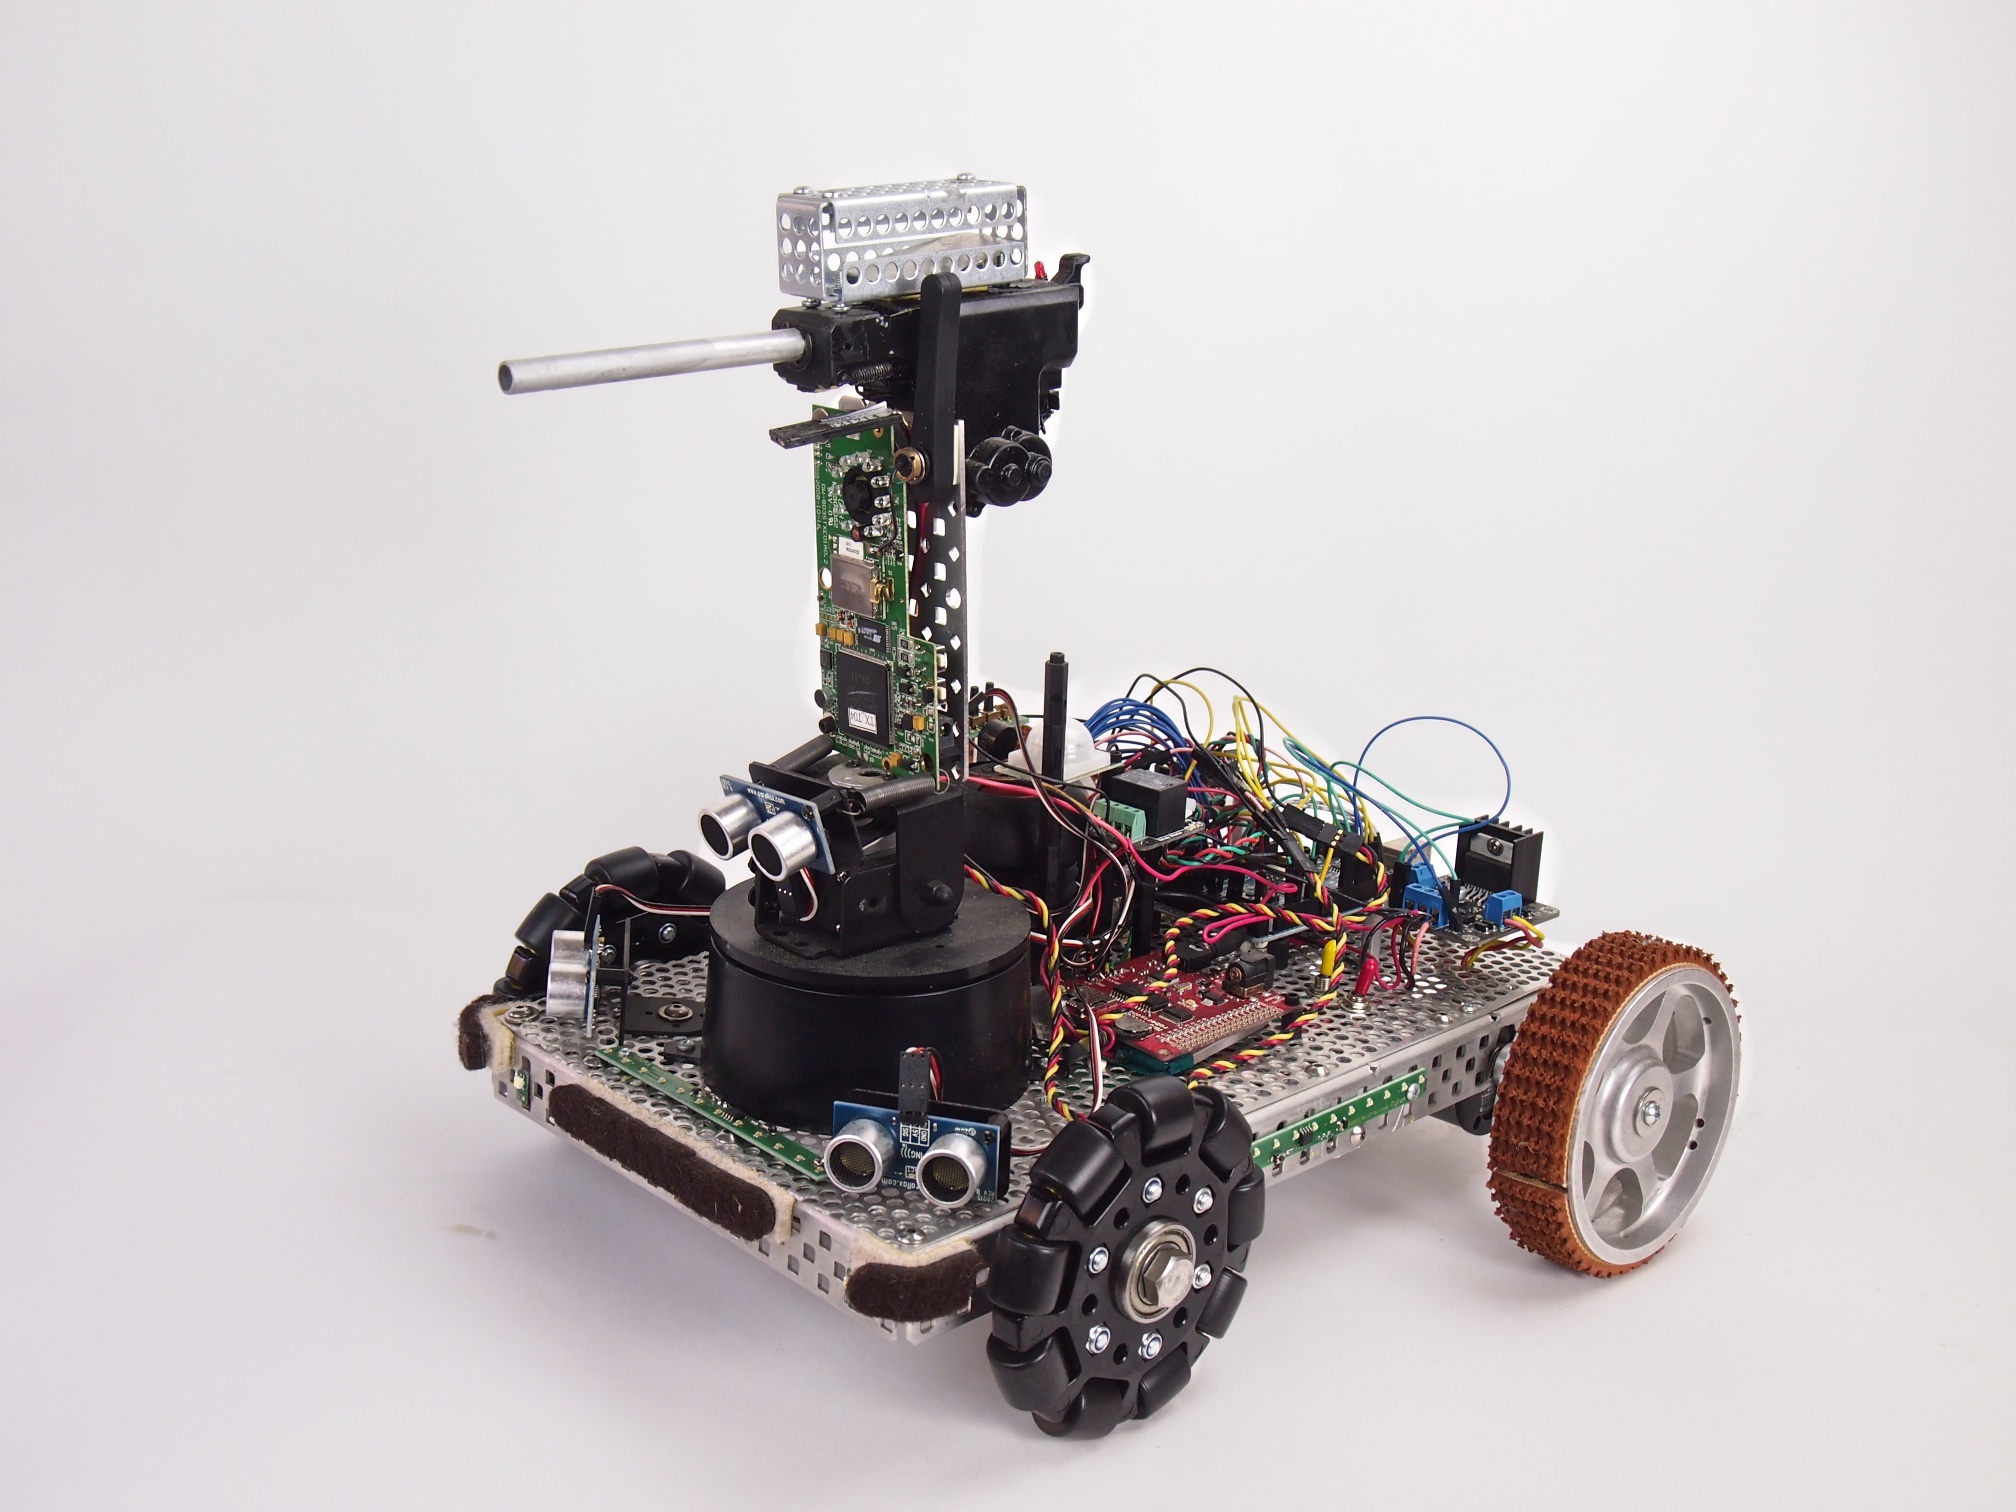
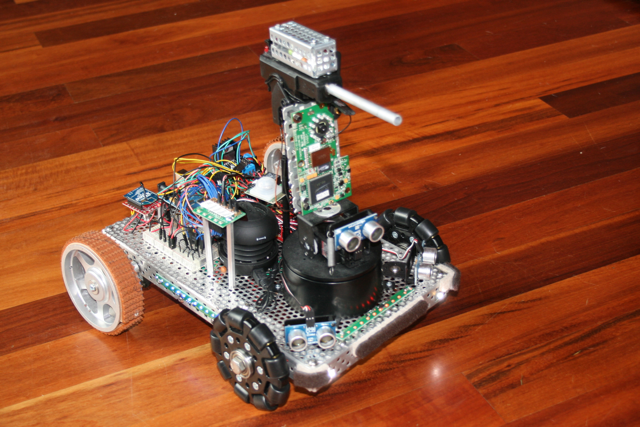
Security V is a small security robot. It’s equipped with the following capabilities:
Automatic electric gun (Airsoft pellet gun) with ammunition cage
Pan-Tilt Gun Turret
Targeting laser
FPV Camera
(3) Ping sensors for object avoidance
LED Light Strips
MP3 Sound Player
IR Human Detection Sensor
Moto Controller
Two motors
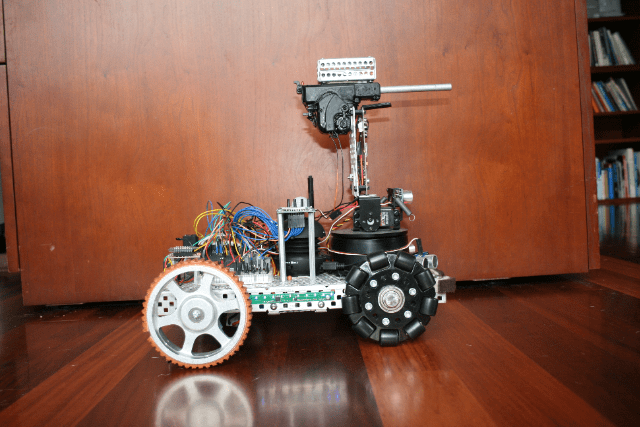
Two treaded drive wheels and two omni wheels
Arduino Mega Microcontroller
Xbee Radio for remote control
Button panel for selecting the mode
We programmed it with five different modes:
1. Roams autonomously around the house, playing R2-D2 like sounds as it explores & avoids obstacles 2. Remote Control 3. Dance Mode (Plays the song Mr. Roboto and dances around) 4. Guard Mode (enables its infrared human detection sensor and plays a police siren if anyone tries to sneak past it) 5. Shoot (shoots the gun)
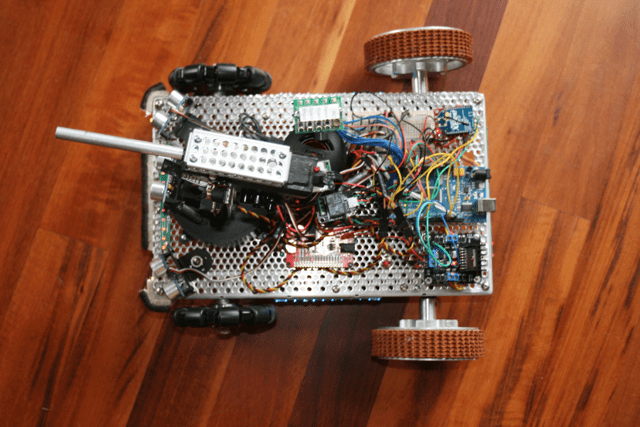
Security RobotSecurity RobotSecurity Robot – Top View