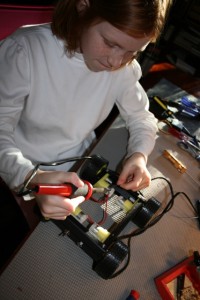
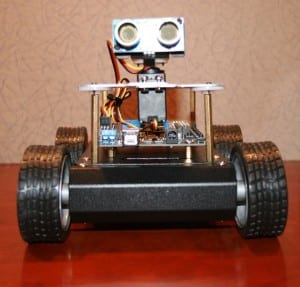
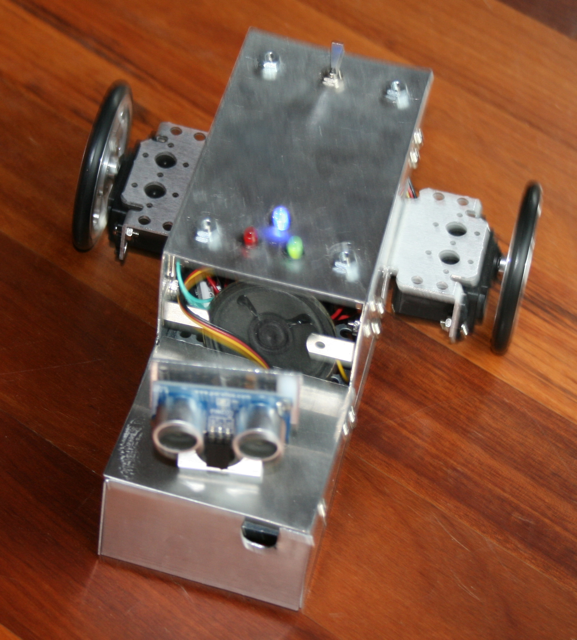
We have had a number of friends and family members ask how they can get started in robotics. They are interested in building a robot, especially a vehicle of some sort, but they don’t know where to begin. So, we have been working on the design for a small, inexpensive, easy to build, multifunctional, Arduino-based, programmable robot that will require basic robot building skills, but nothing too fancy. We call it “KitBot.” Our hope is to be able to help people get started. It will be able to function autonomously, but also by RC. It will include many off-the-shelf parts, a basic rover design, motors, servo, sonar sensor, sound, LED lights, and so on. These are our first pictures, which show the beginnings of the initial test project. It’s not done yet, but you can see the direction we’re moving. We have also sent all the parts to build a KitBot to a father and son team to be our initial Guinea Pigs (they wanted to try building it for a school project). As we work on refining the design and features, we’ll see how the father-and-son team does with the initial construction.
Soldering the power wires to the KitBot’s motorsAssembling our KitBot chassisKitBot: Top ViewKitBot: Corner ViewKitBot: Front ViewKitBot: Side View
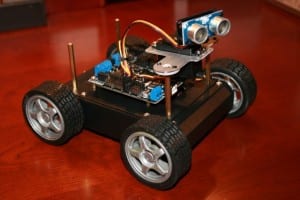
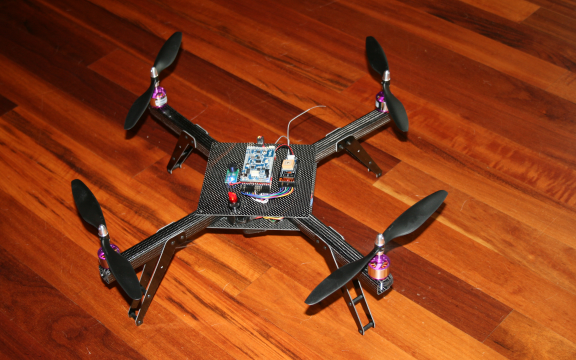
Today, we would like to introduce Black Dragon, our newest flying robot quadrotor. This newest flyer incorporates everything we’ve learned to date about ease-of-use, modular maintainability, crash resistance, lightness, and safety. While we constructed all our previous full-sized quadrotors with aluminum, we designed and built this new flyer with super-cool carbon fiber material. This particular type of carbon fiber, which carries the brand-name “Dragon Plate” (www.dragonplate.com), is used in the aerospace and defense industry, among others. It’s very light, very strong, looks fantastic (the photos don’t do it justice), and is surprisingly machinable.
BLACK DRAGON: Our first carbon fiber quadrotor
Our CAD drawing for the Black Dragon frame design
Our Carbon Fiber Frame
Carbon Fiber Arm. Note that we drilled the motor holes and landing gear holes directly into the arm in order to reduce parts
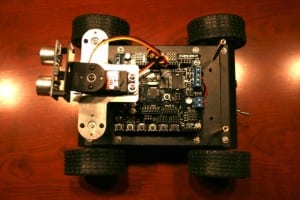
Like our previous quadrotors, we are using the Arduino-based ArduPilot Mega board as the main controller, a 3-axis Inertial Measurement Unit shield (IMU), a GPS for autopilot navigation, Magnetometer for heading control, and a Sonar for altitude control. The robot can be flown via an RC controller or on various autopilot modes. New features include a large illuminated toggle switch for easy on/off in the field, large main plates to hold electronics and wires, improved frame design, complete elimination of the motor mounts (which used to be susceptible to bending), an x-oriented frame (as opposed to +) to provide an open field of view for a camera mounted on the the front, and improved landing gear.
The carbon fiber material is excellent. We love it. It’s easier to machine and work with than we expected (even with the necessary safety precautions), it’s very attractive, but best of all it’s both very light and very strong. For example, the previous aluminum arms weighed in at about 50 grams each. The new arms are 21 grams each. The whole unit ways in at about 850 grams without the LIPO battery.
Close up view of some of Black Dragon’s electronics
We’ve loaded the software into the microcontroller, calibrated the ESC/motors, double-checked the prop rotation, tested the sonar, set the magnetic declination on the magnetometer, confirmed the GPS is giving good long/lat, and it’s ready to fly. We’ve flown it a few inches off the floor indoors just to make sure it’s good-to-go and so far it seems excellent. Perhaps our best ever. As soon as the rain stops, we’ll be testing it in the big blue sky.
For more details on our various flying drone robots, go here.
I want to give special thanks to the folks at Dragon Plate for sending us their cool material.
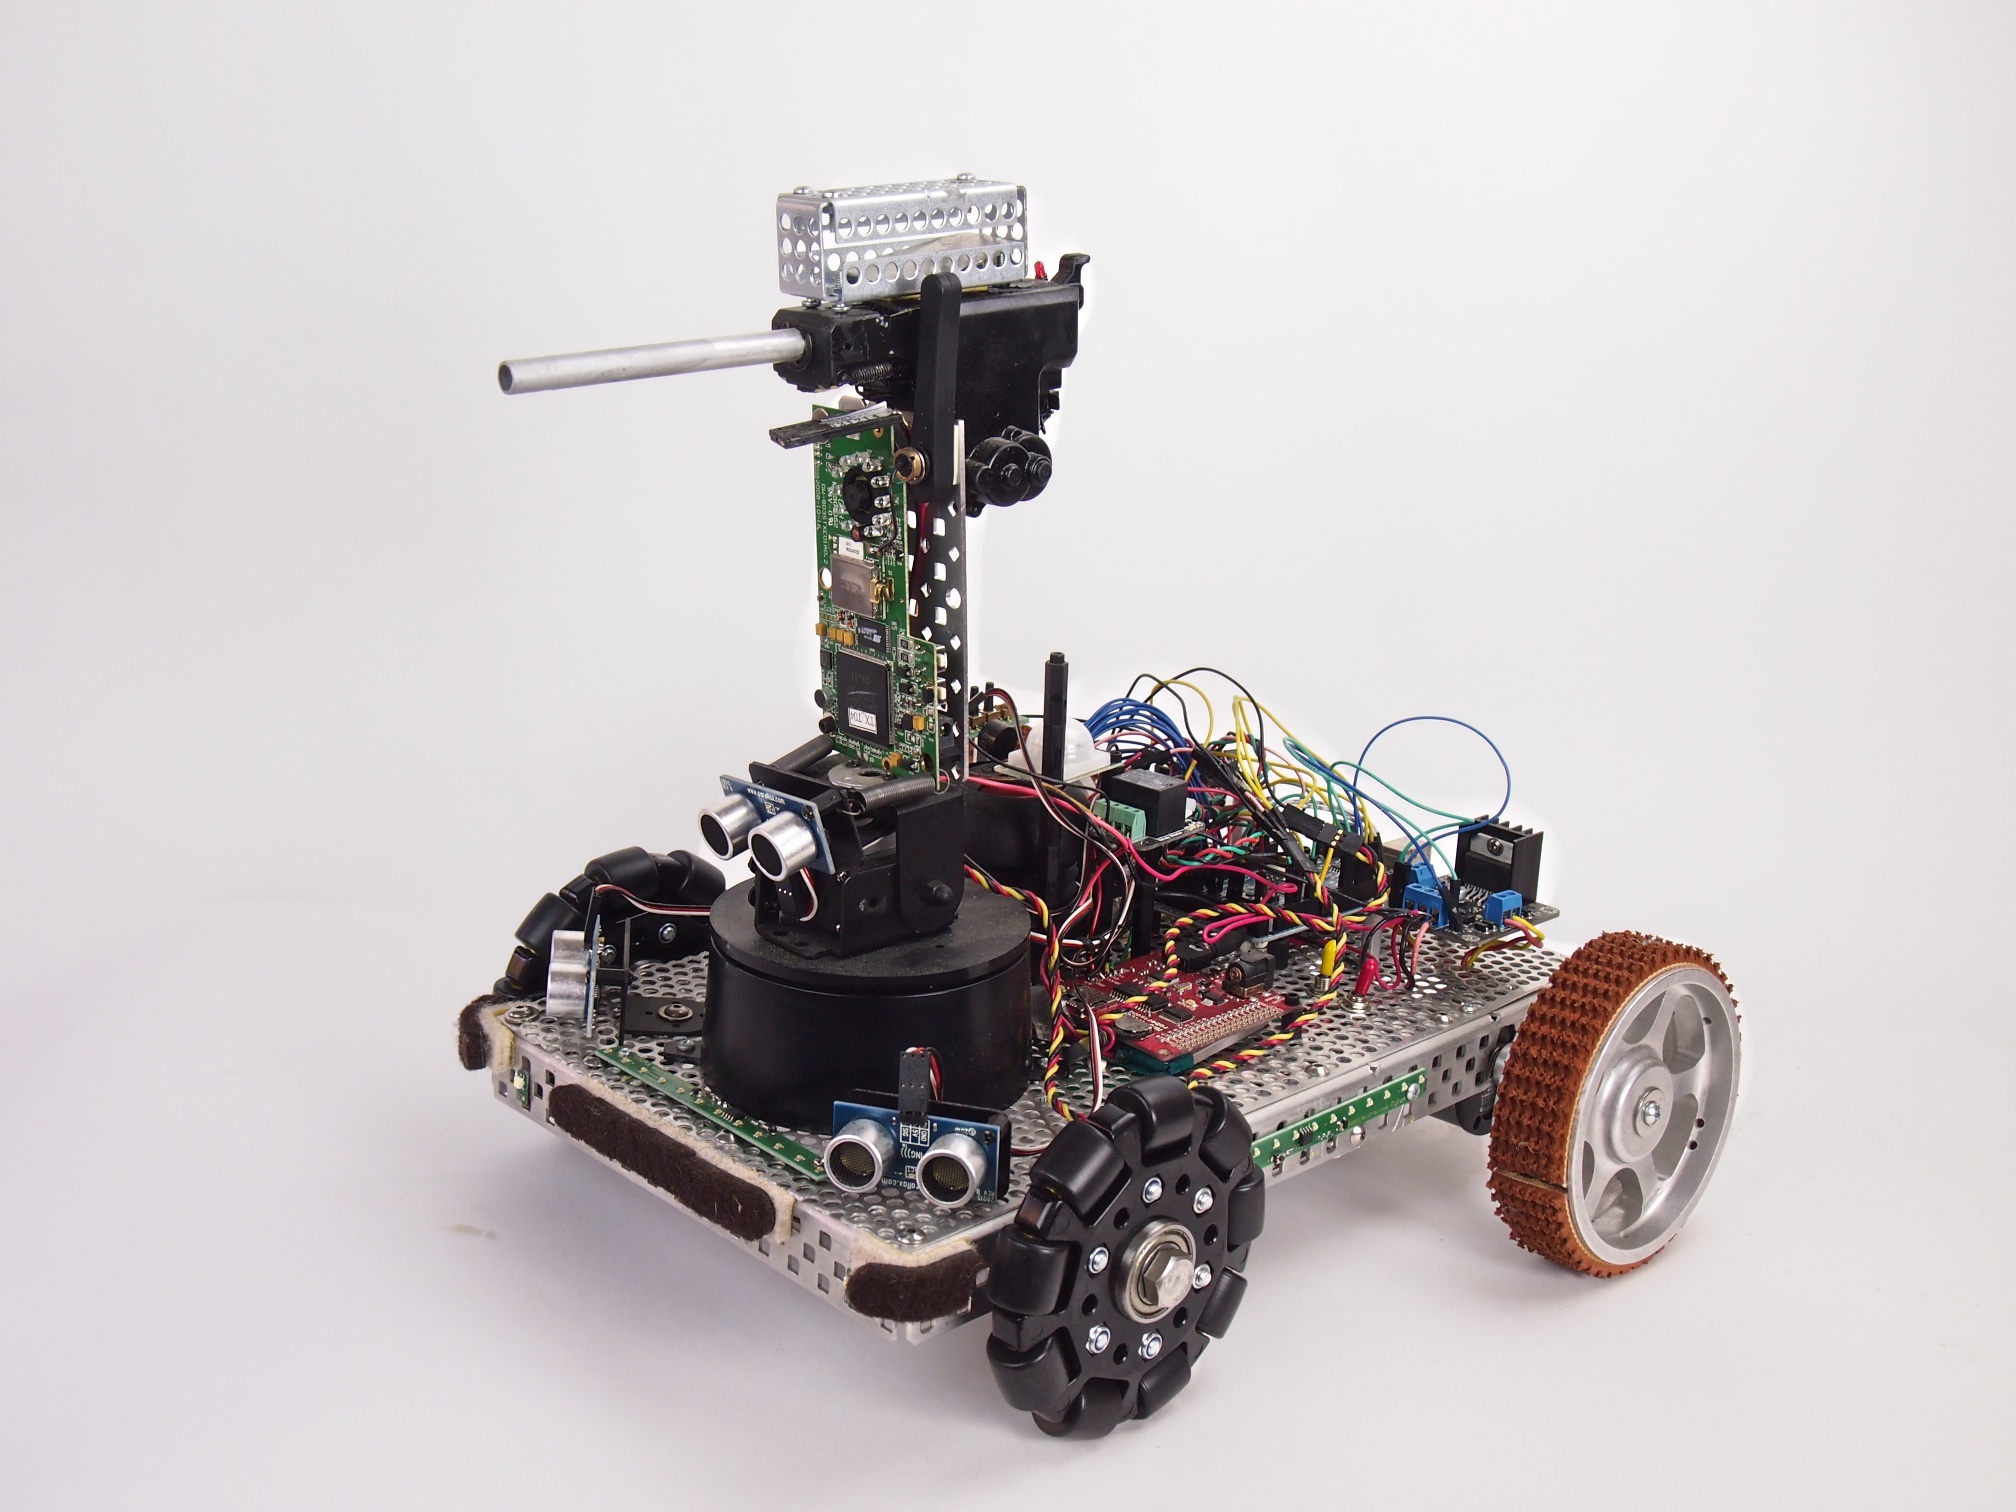
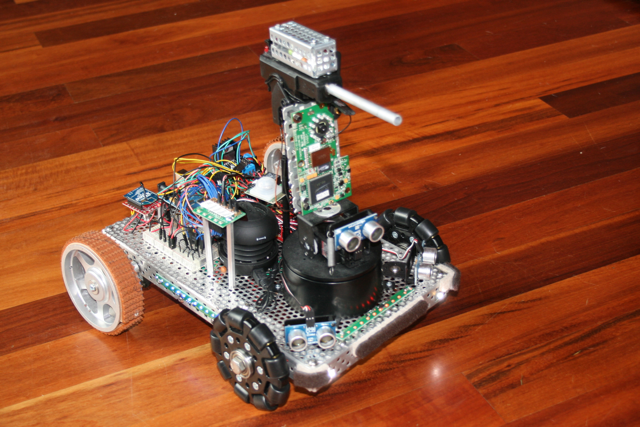
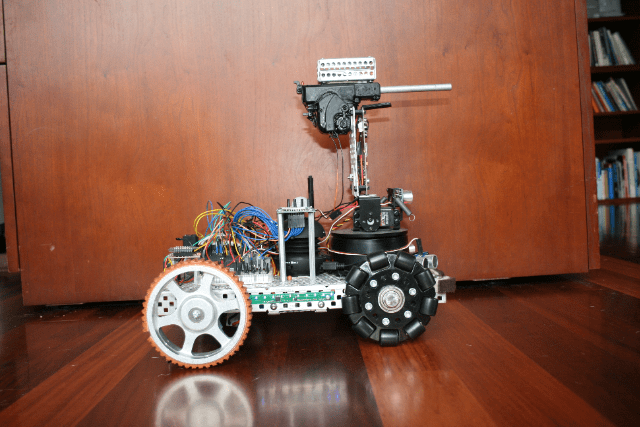
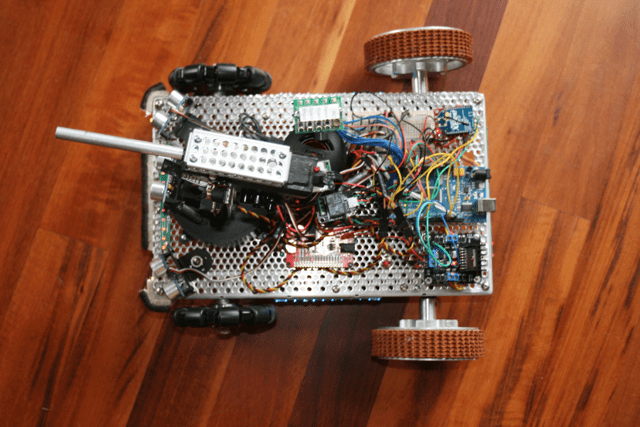
Security V is a small security robot. It’s equipped with the following capabilities:
Automatic electric gun (Airsoft pellet gun) with ammunition cage
Pan-Tilt Gun Turret
Targeting laser
FPV Camera
(3) Ping sensors for object avoidance
LED Light Strips
MP3 Sound Player
IR Human Detection Sensor
Moto Controller
Two motors
Two treaded drive wheels and two omni wheels
Arduino Mega Microcontroller
Xbee Radio for remote control
Button panel for selecting the mode
We programmed it with five different modes:
1. Roams autonomously around the house, playing R2-D2 like sounds as it explores & avoids obstacles 2. Remote Control 3. Dance Mode (Plays the song Mr. Roboto and dances around) 4. Guard Mode (enables its infrared human detection sensor and plays a police siren if anyone tries to sneak past it) 5. Shoot (shoots the gun)
Security RobotSecurity RobotSecurity Robot – Top View
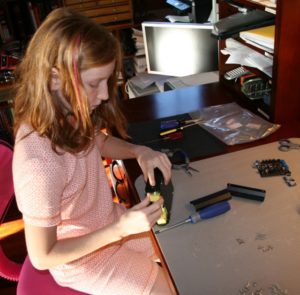
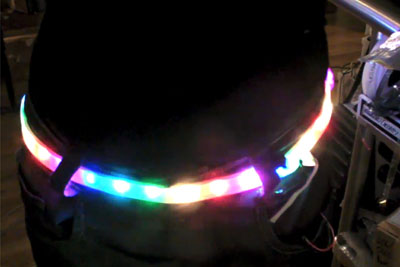
When we were ordering some parts for our Mechatron robot and we discovered a cool strip of LED lights that worked based on “RGB,” which stands for Red-Green-Blue. These are special LED lights that you can program to whatever color you want by combining red, green, and blue together. I looked at my sister and asked if she was interested in making a “Blinky Belt” that we could wear and would light up in various patterns. “Yes!” she said. When the parts arrived, we started building immediately. We cut wires, soldered, and heatshrank. I learned how to tin wires for the first time. Then we soldered the strip of little lights to a tiny Arduino microcontrolller. Then we connected it to a belt buckle and a little pouch to hold the battery and electronics. After we were done with the building phase, we worked on programming it. We were able to program each little light separately so we could make any pattern we wanted, including violet, green, and other colors. Because it was the 4th of July, we made a wild red, white, and blue dancing pattern. It was fun to hold sparklers with a glowing Blinky Belt!
We’ll post a video soon, but for now, here’s a pic.
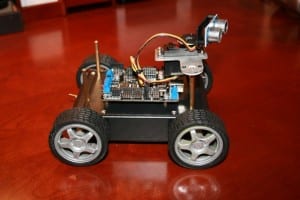
When I first saw Roam-bot I thought he was pretty cool. He talked (at this time we had no talking robots) and he had a aluminum box that hides all of his wires. He was neat, and could go by himself using ping sonar.
When you first turned him on he says “Ready, roger, roger, find best direction” in a deep voice then turns his head to each side saying the number of inches until an object. He says “_ inches, _inches, _ inches” Then goes the direction in which there is the most amount of inches. Now that’s pretty awesome!
We ran into a problem when we came to the point were we needed a caster. No sizes fit his front. While waiting for different sizes to be delivered, we temporally put on a furniture felt pad on so we could still play with him. It worked great! Still none of the sizes fit, so it became permanent. He now can only go on wood floors, but thats okay because we have lots of it!