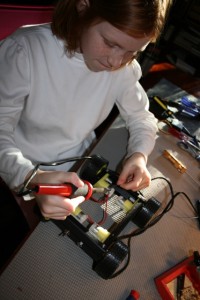
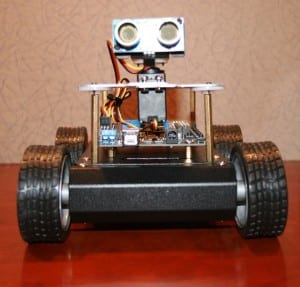
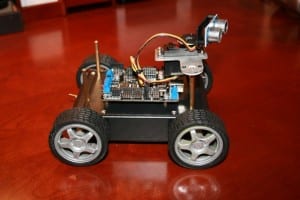
We have had a number of friends and family members ask how they can get started in robotics. They are interested in building a robot, especially a vehicle of some sort, but they don’t know where to begin. So, we have been working on the design for a small, inexpensive, easy to build, multifunctional, Arduino-based, programmable robot that will require basic robot building skills, but nothing too fancy. We call it “KitBot.” Our hope is to be able to help people get started. It will be able to function autonomously, but also by RC. It will include many off-the-shelf parts, a basic rover design, motors, servo, sonar sensor, sound, LED lights, and so on. These are our first pictures, which show the beginnings of the initial test project. It’s not done yet, but you can see the direction we’re moving. We have also sent all the parts to build a KitBot to a father and son team to be our initial Guinea Pigs (they wanted to try building it for a school project). As we work on refining the design and features, we’ll see how the father-and-son team does with the initial construction.
Soldering the power wires to the KitBot’s motorsAssembling our KitBot chassisKitBot: Top ViewKitBot: Corner ViewKitBot: Front ViewKitBot: Side View
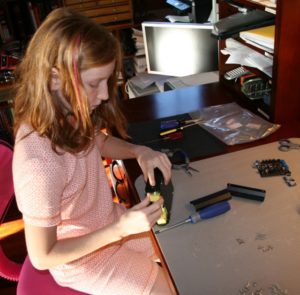
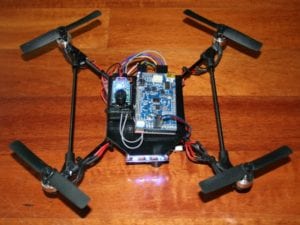
Today, we upgraded our little mini quad rotor flying drone that we call “The Black Hornet.”
We replaced his main board, installed new propellers, re-fixtured his motor mounts, and got him in good flying shape. He flew steady and strong in our test flights.
Genevieve soldering the main circuit board for the Black Hornet
Genevieve connecting electronics on the Black Hornet mini quad rotor
Genevieve finalizing the upgrades on the Black Hornet mini drone
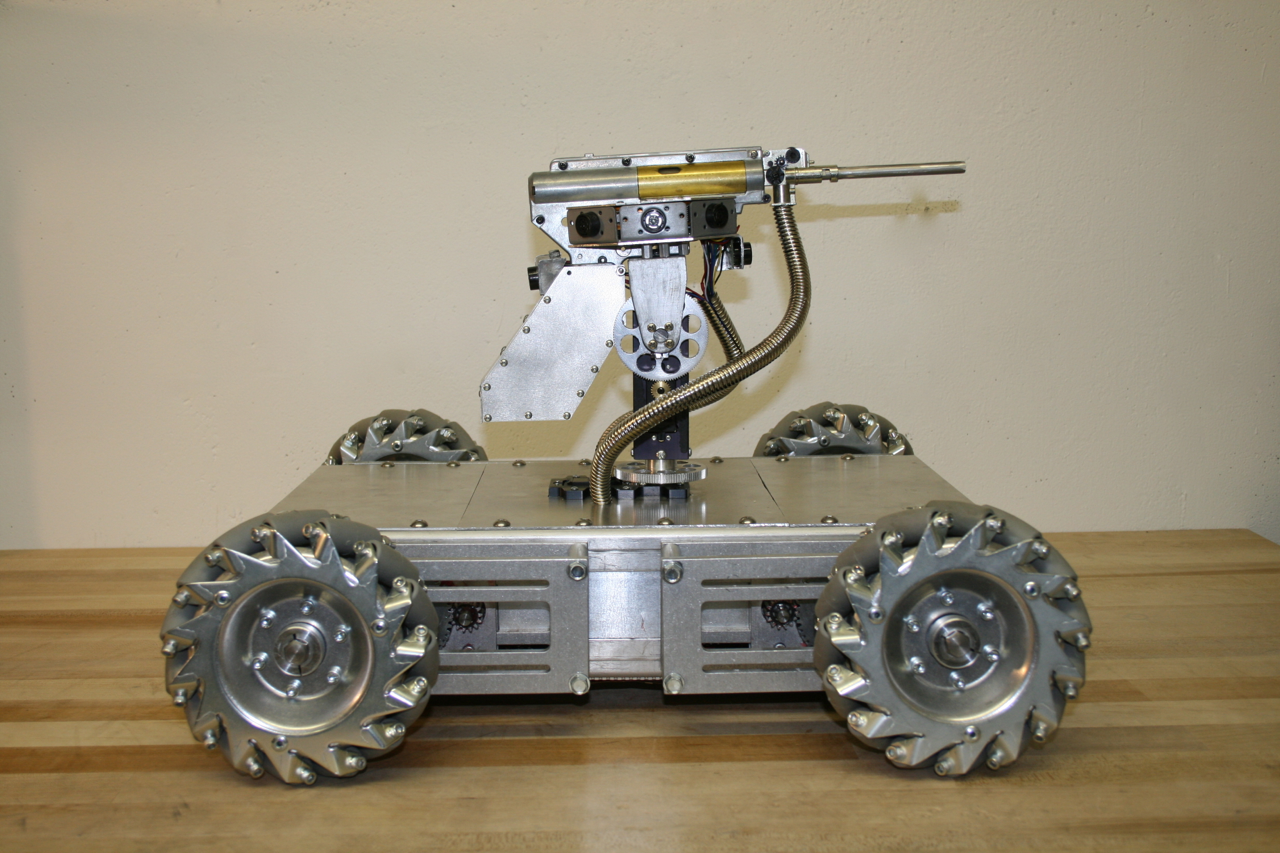
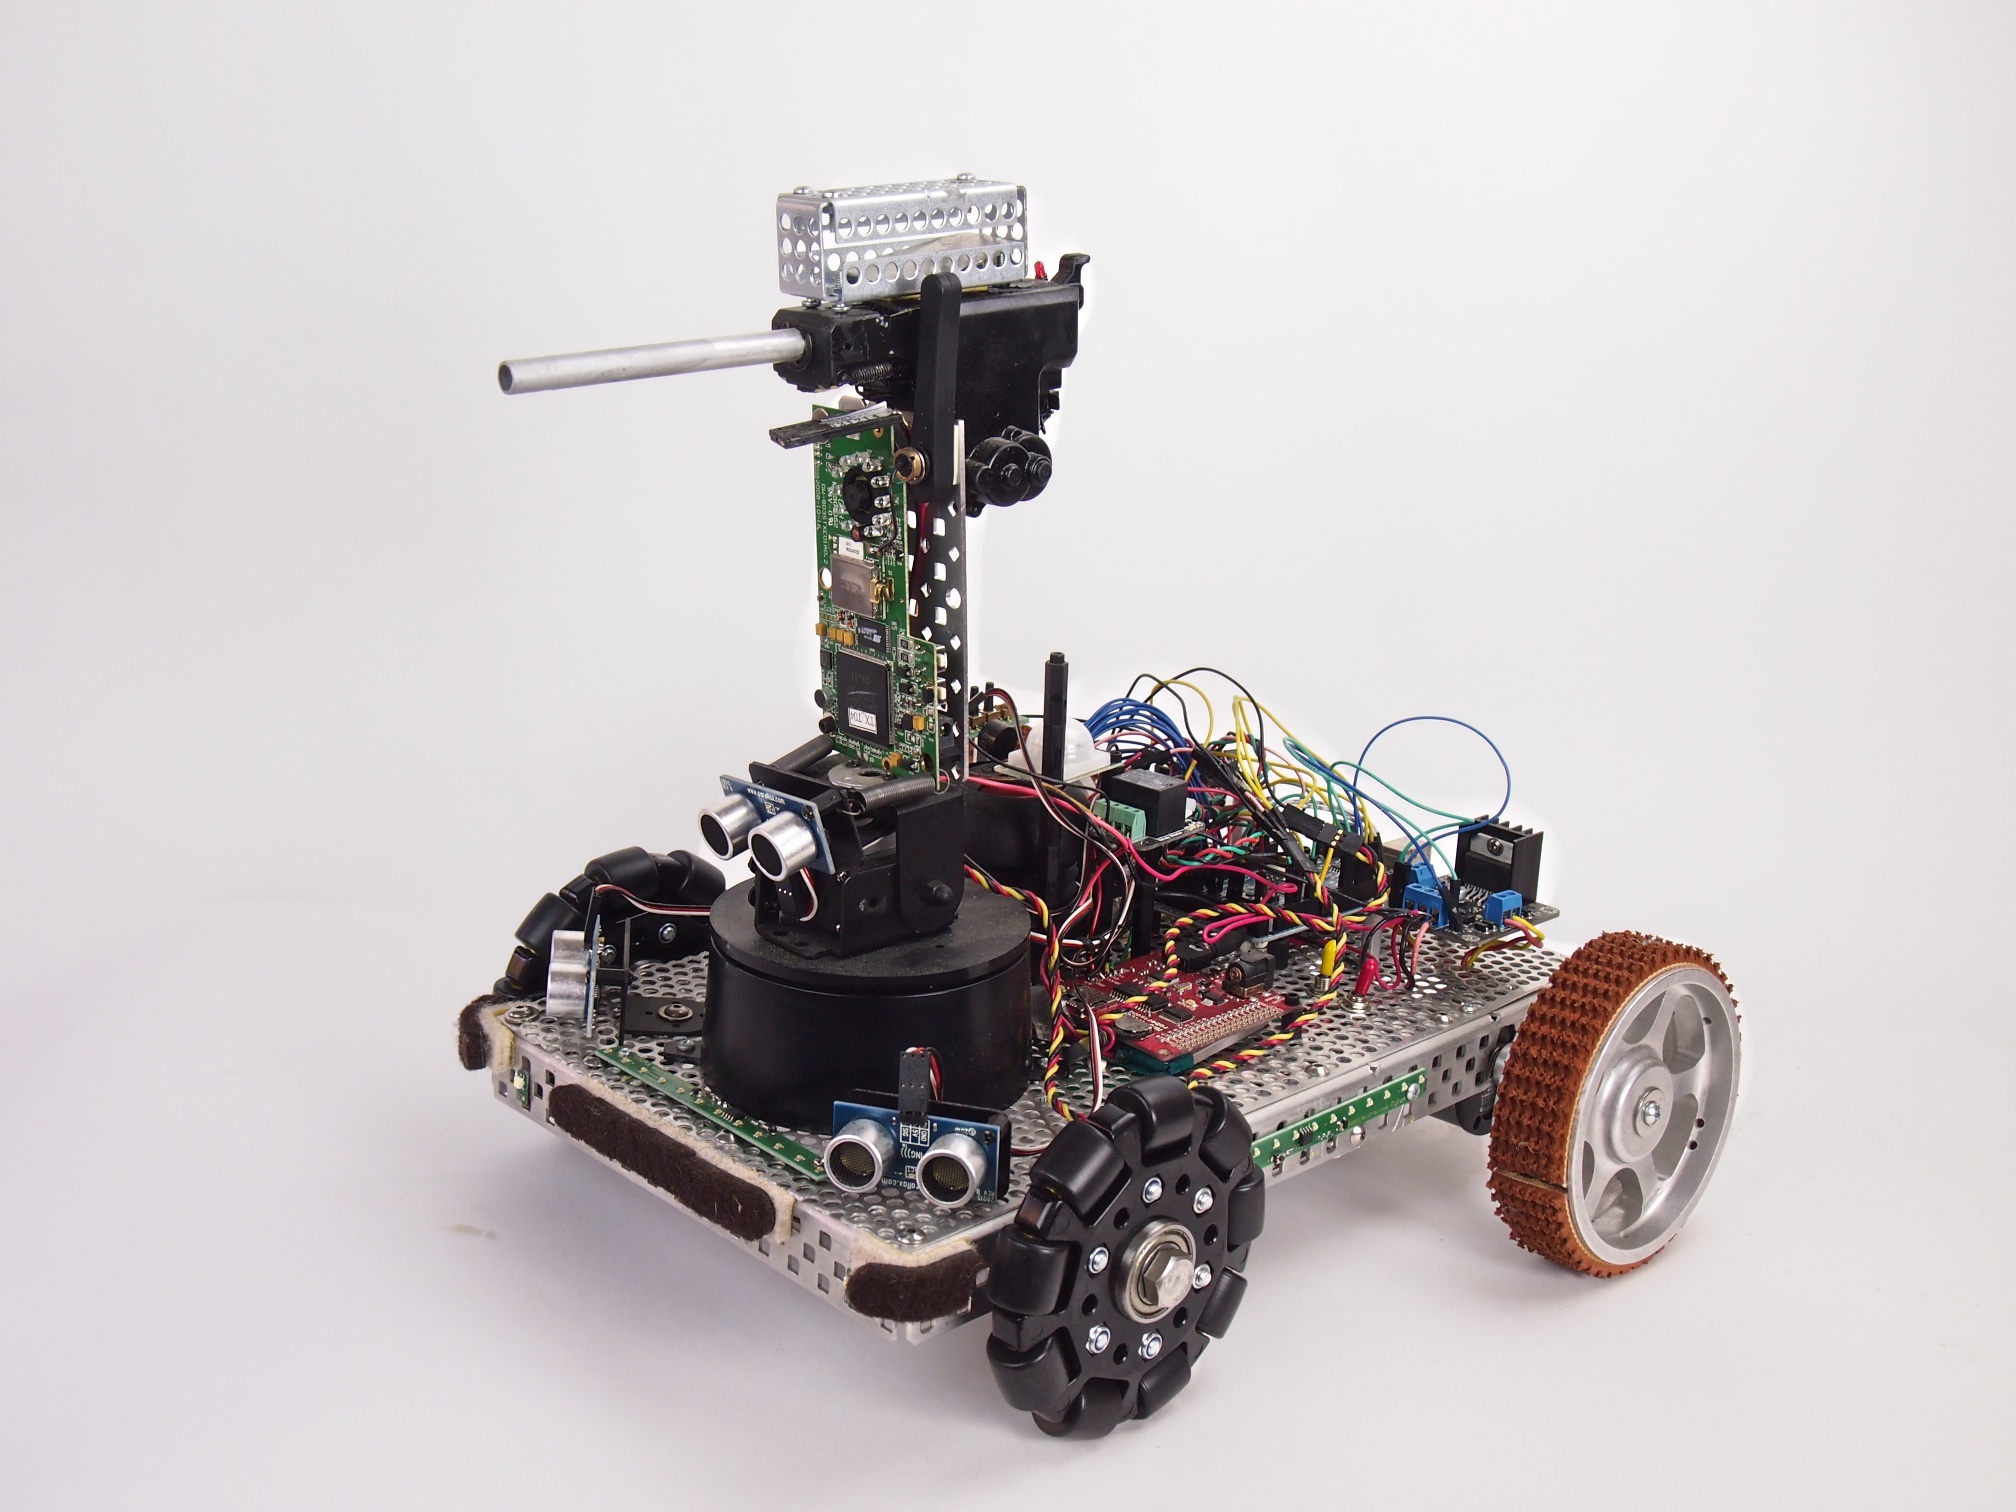
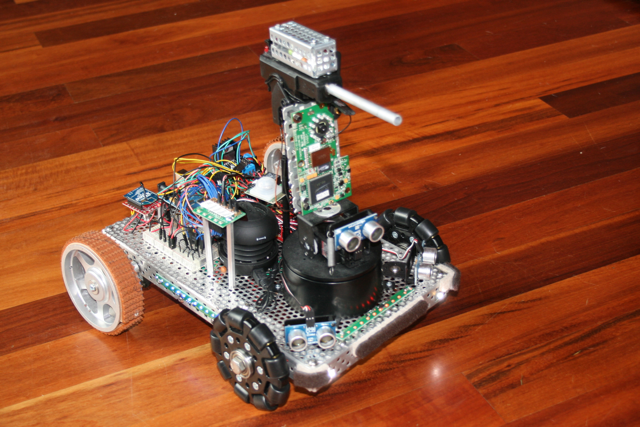
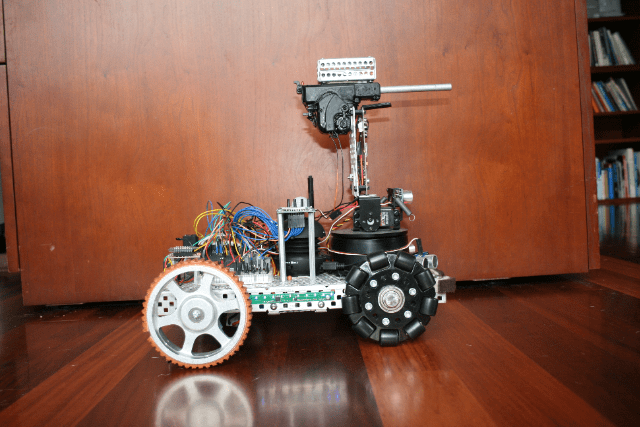
We would like to introduce Mechatron, our mechatronic tank. When we designed and built Mechatron we wanted him to be tough looking, industrial, and retro-futuristic, with lots of metal, rivets, and gears. He’s built entirely out of aluminum, brass, and steel, but inside, he’s chock-full of high tech electronics. See pictures and more text below. And be sure to watch the video to see Mechatron in action!
Mechatron includes special wheels with rollers slanted at 45 degree angles and driven by dedicated gearboxes, four powerful motors, and a software-controlled drive system that we wrote that operates each of the wheels independently. The result is that he can move in any direction at any time in any orientation. In other words, he can drive forward and backwards or turn like a normal vehicle, but he can also drive perpendicular to the direction he’s facing or at any desired angle. Weighing in at forty five pounds, he is by far our heaviest robot, but he is also our most agile, which makes him tremendous fun to drive.
Mechatron’s gun turret pans 360 degrees, includes 8 range-finding sonars for target detection, a laser, and a high-powered electric automatic weapon that shoots brass or plastic pellets. Ammunition is fed from the base of the robot up through one of the articulated metal tubes attached to the turret (the other tube contains wires). He can fire extremely rapidly while standing still or moving.
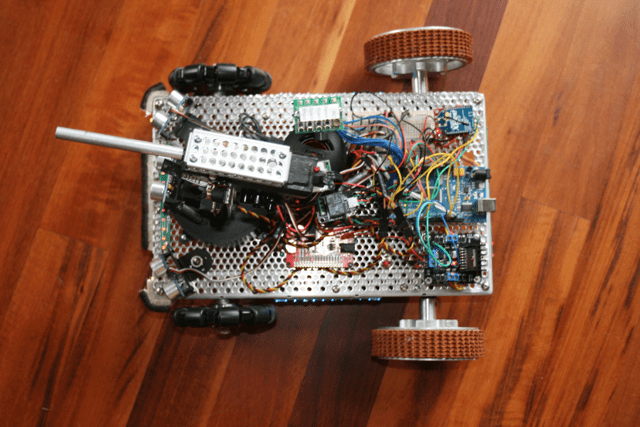
Strips of 52 programmable RGB LED lights have been mounted on Mechatron’s underside and within his turret. The turret LEDs indicate the robot’s current mode and whether the weapon system is armed. The LEDs on the underside change color depending on the direction of each of the individual wheels (Blue = Stopped. Green = Forward. Red = Backward), which helps to illuminate how Mechatron’s unique drive system works.
Mechatron is designed to function in a variety of different modes, including both user-controlled Radio Control and/or fully-autonomous. For the RC mode, we built our own controller which matches Mechatron in look-and-feel. The left joystick controls the pan and tilt of the gun turret and includes the firing button on top (which is armed using the missile switch). The right joystick controls the drive system. Forward and Backward motion (Y-axis) moves the robot forward or backward. Twisting the joystick turns the robot in the direction of twist (Z-axis). Moving the joystick left or right (X-axis) causes the robot to strafe left or right while maintaining his current orientation. Combined X-Y-Z joystick motions create unique and agile movements, such as strafing in circles. The robot can move in any direction, while panning and tilting its turret and firing all at the same time.
Technical Specifics:
Overall Design: Beatty Robotics
Arduino Software: Beatty Robotics
Metal armor plates: Beatty Robotics
Main Microcontroller: Arduino Mega 2560
Microcontroller used for controlling LED lights: Arduino Nano
Light Controller Software: Beatty Robotics
Wheels: AndyMark (special thanks to Andy Baker, who was great to work with on these)
Drive Gears: Modulox (special thanks to Dan Richardson at iR3 Creative Engineering & Andy Baker at AndyMark)
Pan-Tilt gears and other parts: RobotZone (special thanks to ServoCity)
Pan-Tilt Servos: Hitec Digital
Sonars: (12) Maxbotix MaxSonar Ultrasonic Sensors
Turret Sensor Head: Beatty Robotics
RGB LED strips: Adafruit (Go Blinky Belt!)
MP3 Sound Board: Sparkfun MP3 Trigger
Servo Controller: Pololu Maestro
Voltage Regulators: Pololu & Dimension Engineering
High-amp Relays: DFRobot
Motor Controllers: (2) Dimension Engineering Sabertooth 2×25
Motors: (4) CIM
Wireless Communication: Xbee Radio with Sparkfun Xbee Explorer Regulated board
Joy Sticks: (2) 3-axis hall-effect joysticks from CH Products
Batteries: (1) 12v 3-cell Lithium-Polymer 20C
Aluminum, hardware, fasteners, wire, tools, and much else: McMaster-Carr
Wire, electronic components, IC boards, and much else: Sparkfun & RobotShop
Security V is a small security robot. It’s equipped with the following capabilities:
Automatic electric gun (Airsoft pellet gun) with ammunition cage
Pan-Tilt Gun Turret
Targeting laser
FPV Camera
(3) Ping sensors for object avoidance
LED Light Strips
MP3 Sound Player
IR Human Detection Sensor
Moto Controller
Two motors
Two treaded drive wheels and two omni wheels
Arduino Mega Microcontroller
Xbee Radio for remote control
Button panel for selecting the mode
We programmed it with five different modes:
1. Roams autonomously around the house, playing R2-D2 like sounds as it explores & avoids obstacles 2. Remote Control 3. Dance Mode (Plays the song Mr. Roboto and dances around) 4. Guard Mode (enables its infrared human detection sensor and plays a police siren if anyone tries to sneak past it) 5. Shoot (shoots the gun)
Security RobotSecurity RobotSecurity Robot – Top View
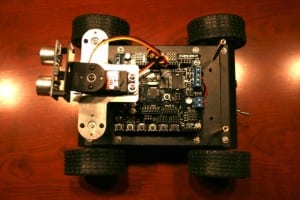
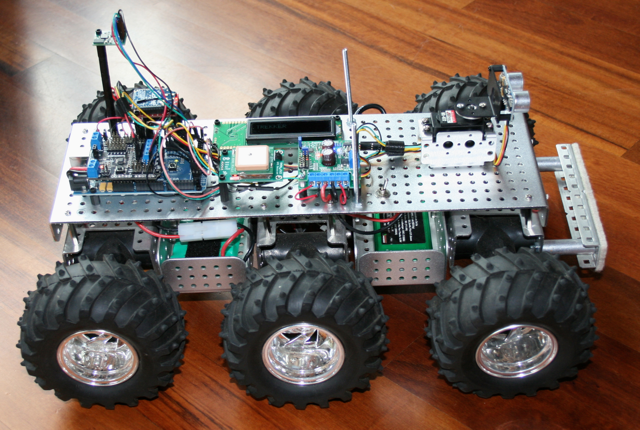
After building a number of indoor robots, we decided to build an outdoor robot capable of traveling through rough terrain. We call it “Trekker.”
TREKKER ROBOT. Six wheels. Six motors. Batteries below deck. Electronics above deck.
First, we put together a six-wheel independent suspension with a separate motor on each wheel and large knobby tires. Each wheel moves up and down separately, which allows this little beast to climb up and over just about any obstacle (rocks, slopes, cats, whatever gets in its way). Here is a video of Trekker going over a large pile of books.
This is by far our funnest robot to drive via Remote Control, but this true magic of Trekker is his navigational capabilities.
We wired Trekker with a GPS chip and a tilt-compensated magnetometer (an electronic compass that works even when the robot is tilted). When Trekker first comes on, he automatically looks for and synchs with as many satellites as he can find in the sky (usually about 10-15). We programmed Trekker to determine his exact latitude and longitude position using the GPS as well as his directional orientation using the magnetometer. He then travels on his own to a series of latitude and longitude waypoints (that we get from Google Earth). Trekker’s navigational algorithm was one of our most ambitious software challenges to date. Our favorite test run is to put him in our backyard and give him instructions to drive around the big tree, down to the barn, drive around the goat pen, and return to us. He does it beautifully, all on his own, moving systematically from one waypoint to another. We also equipped him with a forward-facing sonar, which swivels back and forth on a pan servo, to avoid trees and other large obstacles along the way.
Trekker Robot – Top View – The white square in the middle is the GPS, which is used for navigation. When traveling between waypoints, the Longitude and Latitude display on the little LCD screen.
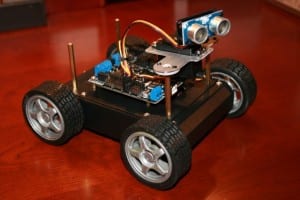
Trekker – Front View – This provides a nice view of the sonar at the front of the robot, which is used for obstacle detection and avoidance when traveling in automated mode. The magnetometer (compass) is mounted on a tall shaft at the back of the robot to keep it clear of interference from the other electronics, especially the radio.
This picture of Trekker’s underside shows how each wheel connects to a separate motor (black t-shaped things). Each motor housing is on springs and swivels so that it moves separately from the other motors.
Thanks to the shock-absorbing independent suspension of each of its six wheels, Trekker rolls over pretty much anything
Software Modes
We programmed Trekker with a several different modes he can operate in:
Navigate autonomously to a series of user-provided Longitude/Latitude Waypoints
Roam autonomously using swiveling front sensor to avoid obstacles and find best path
Radio Control (RC) – display commands and motor speeds on LCD
Radio Control (RC) – display longitude, latitude, and heading on LCD