by Camille | Robots, Slider, Workshop Blog
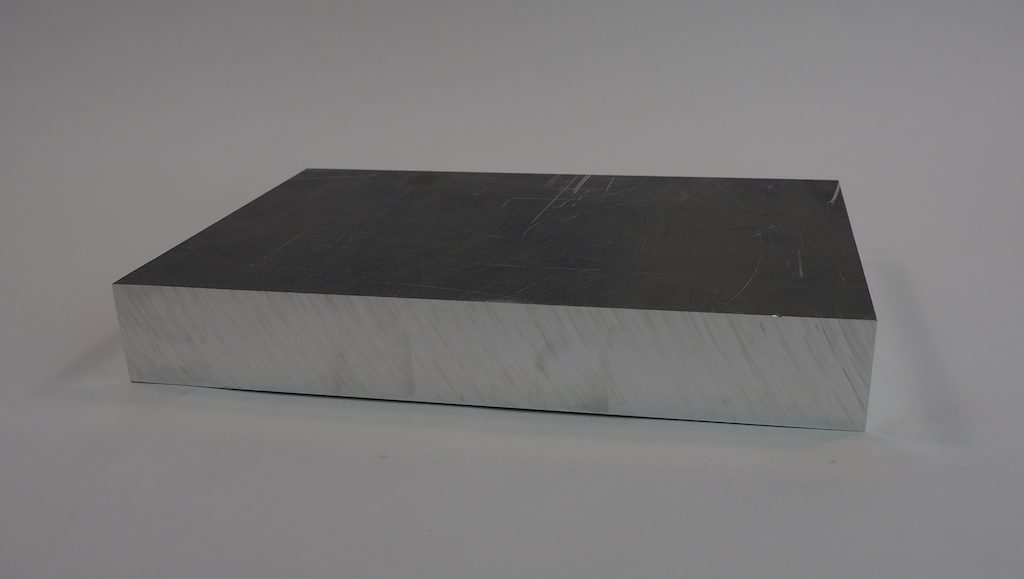
We’ve been working on a fun new robot we call Metalbot. Our goal was to build an autonomous rover with a unibody design that was machined out of a single block of metal. We started with this 13” x 9” x 1.75” block of 6061 aluminum:
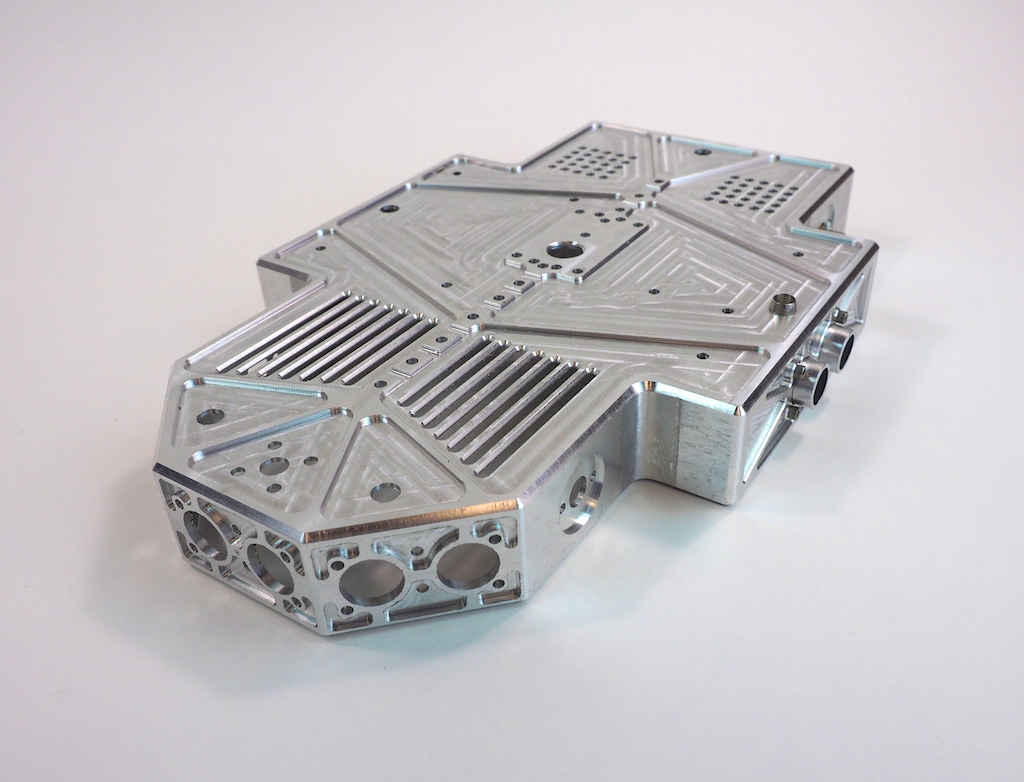
When the machining was done, the robot’s body looked like this. It’s a hollowed-out shell that is about 1/8” thick with holes, slots, and pockets for the motors, LEDs, sensors, and other electronics.
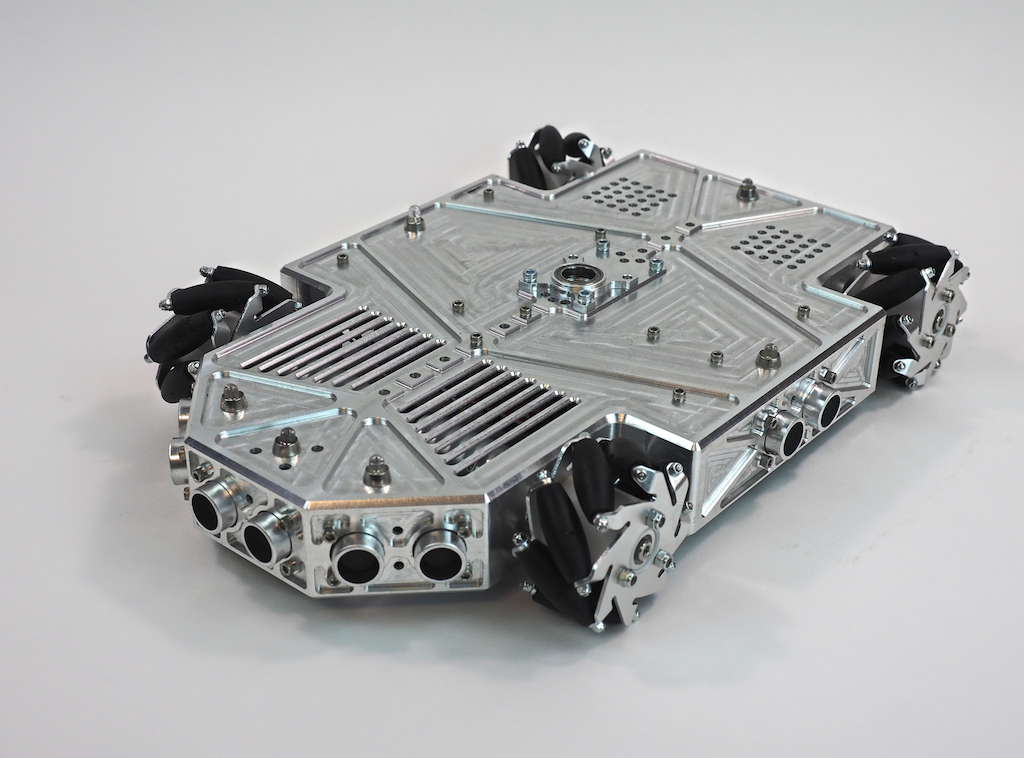
Once Metalbot was assembled with the internal components, it looked like this:
What do you think? We think it’s pretty cool looking. Do you like it?
Work-in-Process Pics
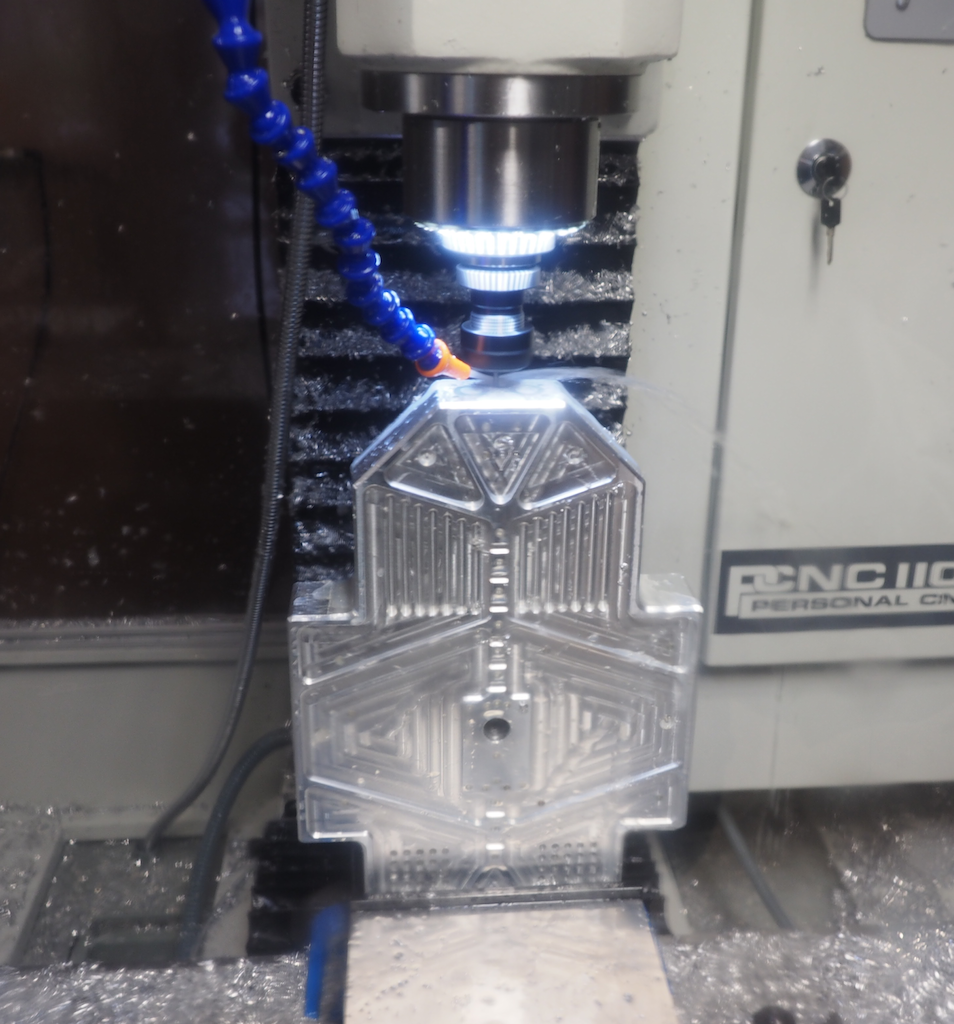
In this first picture (which was taken through the polycarbonate enclosure), we clamped the part vertically in the vise and we’re using an 1/8″ end mill to machine the detail on the front of the nose. In a previous operation we clamped the stock flat and machined the top of the robot, so that work is already done. Because this part has features on every side, machining it required us to clamp the stock in the vise in 8 different orientations: top, left side, right side, back, front, 45-degree left nose, 45-degree right nose, and bottom.
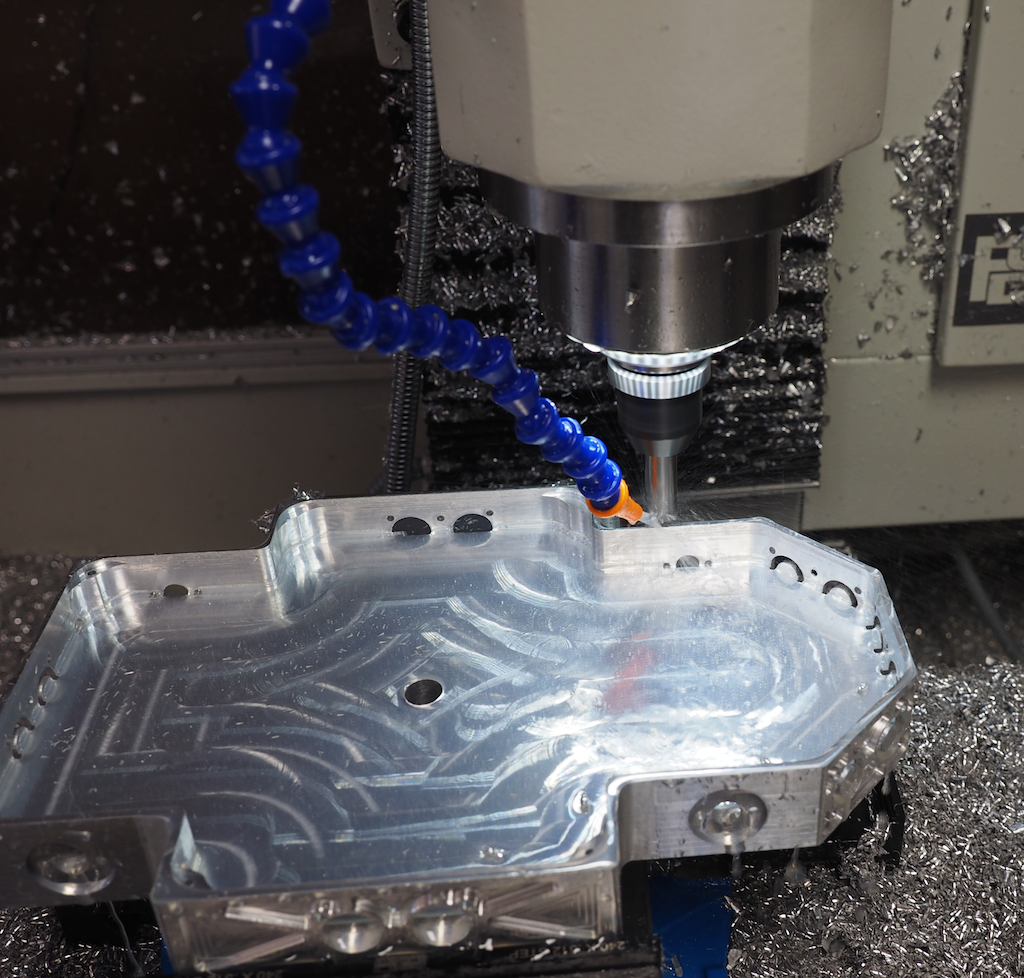
In this next picture, we’re on the last setup, machining out the large pocket on the underside of the robot. This turned the aluminum block into a 1/8” thick shell. The large pocket appears to be glowing because the ring of LEDs we installed around the mill’s spindle are shining into the coolant that has filled the pocket. We’re using a 25mm (.98”) modular end mill here, which is designed to remove material fast. Of course, there were a lot of metal chips, but it’s important to remember that aluminum is easy and efficient to recycle.

In this picture we’re half way done digging the pocket and we have the machine take a break from the hard work to chamfer the outside contour:
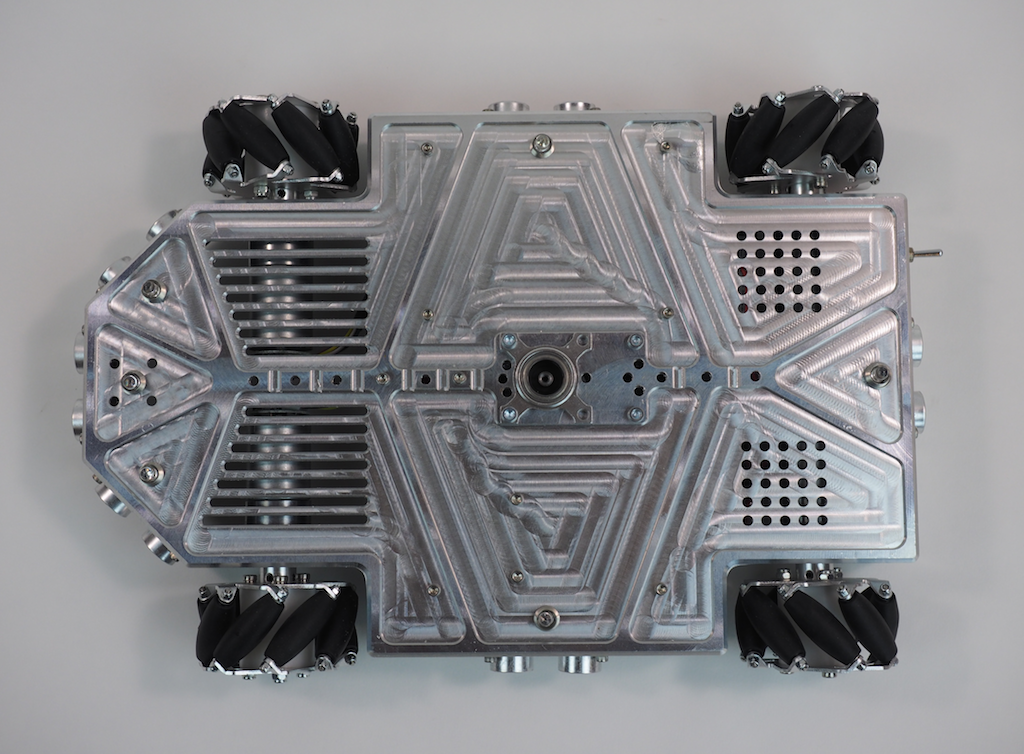
Once the body is machined, we screwed in the wheels, motors, and electronics, which are screwed upside down on the underside, where they are easy to access when the robot is turned over. We will install a bottom plate later.
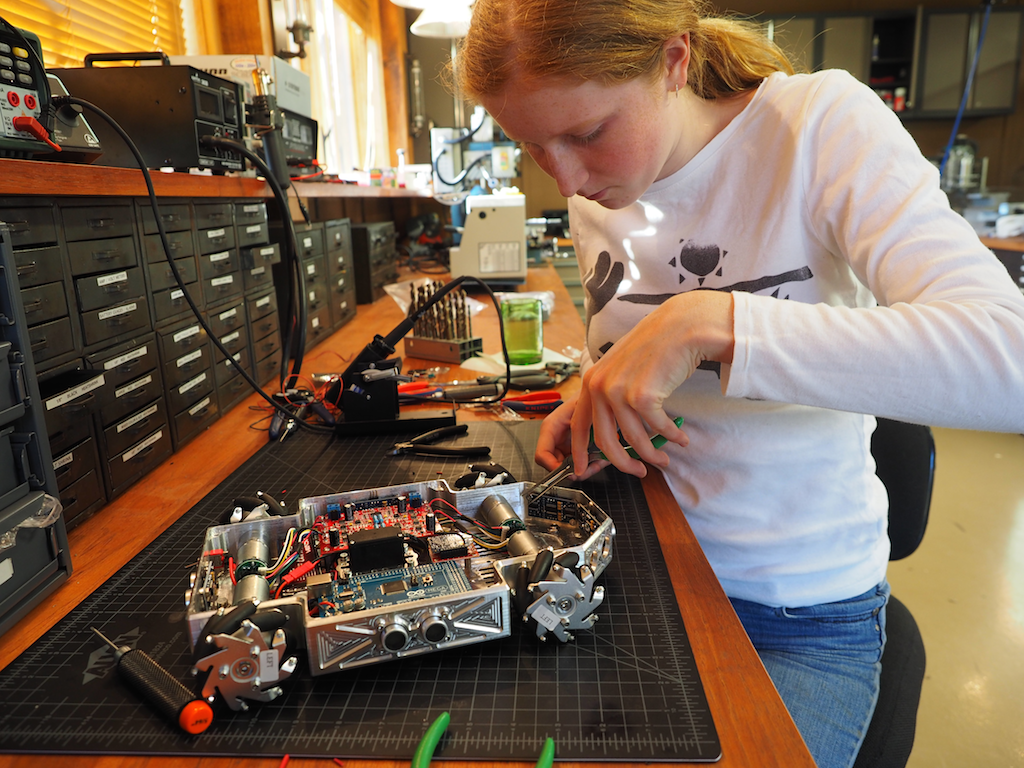
Then we did the wiring and soldering:

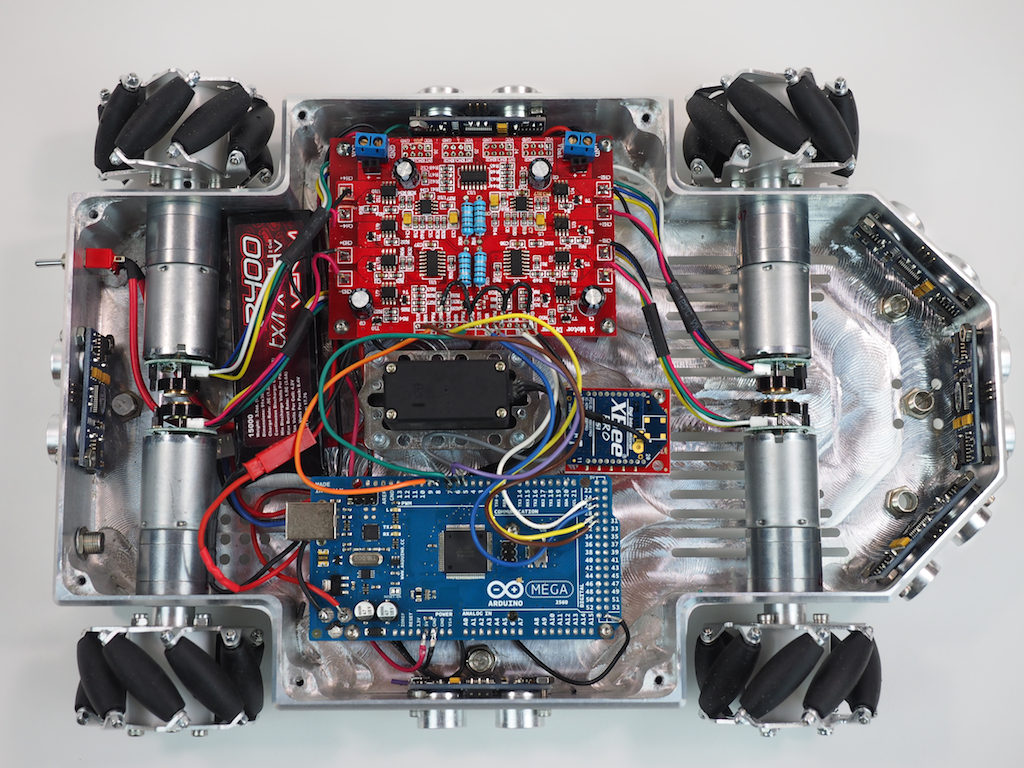
Here is the underside of the robot with most of the electronics installed. We’re using an Arduino Mega and a 4-channel Motor Controller, along with 4 Pololu gear motors to drive the mecanum wheels, which will allow the robot to strafe. The robot is also equipped with 6 Ping ultrasonic sensors for autonomous object detection, a LIPO battery, a main power switch, 6 NeoPixel RGB LEDs to indicate the state of each sensor, an Xbee Radio, and a panning servo (black thing in the middle). The robot will also be equipped with an MP3 module and speaker for sound, but those haven’t been installed yet.
The robot’s finished body is 8” wide and 12” long. The rover can be fitted with either the mecanum wheels shown or CNC-machined conventional wheels (not shown). Our original goal was just to machine a cool looking rover out of a single piece of metal, but as we went along, we decided to add some flexibility into the design for future enhancements in case we wanted to do more with it. The robot has been designed with a central spine of holes and ridges for attaching future add-ons, including a servo mounted in the center, which will support a pan-tilt turret for a camera, gun, or arm. We have designed the pan-tilt turret to utilize the Actobotics ecosystem, but other pan-tilt mechanisms could also be used. There are also holes on the front and rear of the top deck that are compatible with the full range of Actobotics components such as brackets, hubs, and channels, which really adds a lot of flexibility.
The next step is to work on the sensors and software programming. With its mecanum wheels, it should be able strafe like a champ very soon.
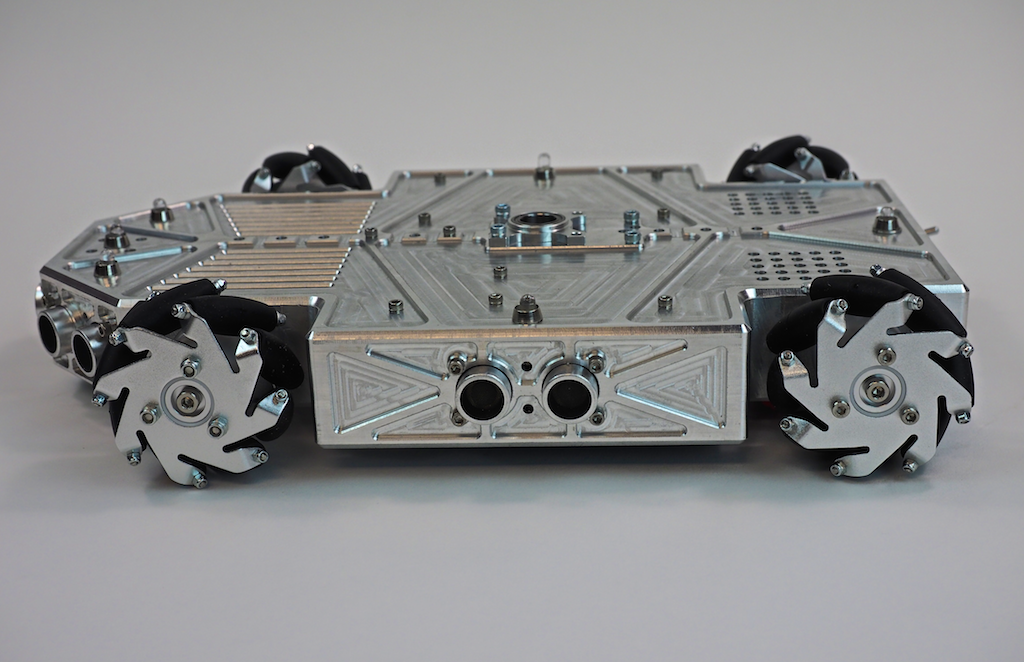
Here are a few more pictures of Metalbot so far. Let us know what you think. Do you like the overall design?

by Camille | Robots, Slider, Workshop Blog
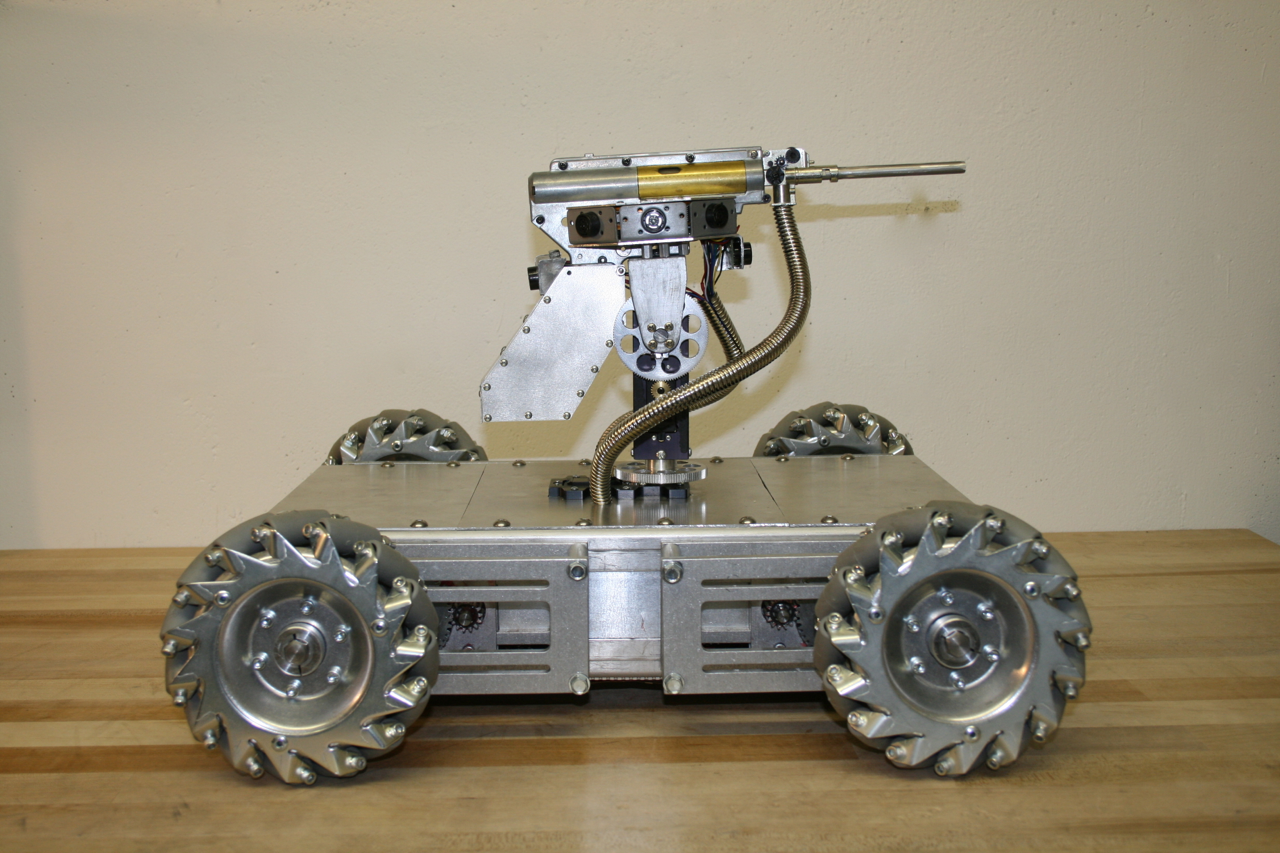
We would like to introduce Mechatron, our mechatronic tank. When we designed and built Mechatron we wanted him to be tough looking, industrial, and retro-futuristic, with lots of metal, rivets, and gears. He’s built entirely out of aluminum, brass, and steel, but inside, he’s chock-full of high tech electronics. See pictures and more text below. And be sure to watch the video to see Mechatron in action!

Mechatron includes special wheels with rollers slanted at 45 degree angles and driven by dedicated gearboxes, four powerful motors, and a software-controlled drive system that we wrote that operates each of the wheels independently. The result is that he can move in any direction at any time in any orientation. In other words, he can drive forward and backwards or turn like a normal vehicle, but he can also drive perpendicular to the direction he’s facing or at any desired angle. Weighing in at forty five pounds, he is by far our heaviest robot, but he is also our most agile, which makes him tremendous fun to drive.
Mechatron’s gun turret pans 360 degrees, includes 8 range-finding sonars for target detection, a laser, and a high-powered electric automatic weapon that shoots brass or plastic pellets. Ammunition is fed from the base of the robot up through one of the articulated metal tubes attached to the turret (the other tube contains wires). He can fire extremely rapidly while standing still or moving.
Strips of 52 programmable RGB LED lights have been mounted on Mechatron’s underside and within his turret. The turret LEDs indicate the robot’s current mode and whether the weapon system is armed. The LEDs on the underside change color depending on the direction of each of the individual wheels (Blue = Stopped. Green = Forward. Red = Backward), which helps to illuminate how Mechatron’s unique drive system works.
Mechatron is designed to function in a variety of different modes, including both user-controlled Radio Control and/or fully-autonomous. For the RC mode, we built our own controller which matches Mechatron in look-and-feel. The left joystick controls the pan and tilt of the gun turret and includes the firing button on top (which is armed using the missile switch). The right joystick controls the drive system. Forward and Backward motion (Y-axis) moves the robot forward or backward. Twisting the joystick turns the robot in the direction of twist (Z-axis). Moving the joystick left or right (X-axis) causes the robot to strafe left or right while maintaining his current orientation. Combined X-Y-Z joystick motions create unique and agile movements, such as strafing in circles. The robot can move in any direction, while panning and tilting its turret and firing all at the same time.
Technical Specifics:
- Overall Design: Beatty Robotics
- Arduino Software: Beatty Robotics
- Metal armor plates: Beatty Robotics
- Main Microcontroller: Arduino Mega 2560
- Microcontroller used for controlling LED lights: Arduino Nano
- Light Controller Software: Beatty Robotics
- Wheels: AndyMark (special thanks to Andy Baker, who was great to work with on these)
- Drive Gears: Modulox (special thanks to Dan Richardson at iR3 Creative Engineering & Andy Baker at AndyMark)
- Pan-Tilt gears and other parts: RobotZone (special thanks to ServoCity)
- Pan-Tilt Servos: Hitec Digital
- Sonars: (12) Maxbotix MaxSonar Ultrasonic Sensors
- Turret Sensor Head: Beatty Robotics
- RGB LED strips: Adafruit (Go Blinky Belt!)
- MP3 Sound Board: Sparkfun MP3 Trigger
- Servo Controller: Pololu Maestro
- Voltage Regulators: Pololu & Dimension Engineering
- High-amp Relays: DFRobot
- Motor Controllers: (2) Dimension Engineering Sabertooth 2×25
- Motors: (4) CIM
- Wireless Communication: Xbee Radio with Sparkfun Xbee Explorer Regulated board
- Joy Sticks: (2) 3-axis hall-effect joysticks from CH Products
- Batteries: (1) 12v 3-cell Lithium-Polymer 20C
- Aluminum, hardware, fasteners, wire, tools, and much else: McMaster-Carr
- Wire, electronic components, IC boards, and much else: Sparkfun & RobotShop

