At Beatty Robotics, we’ve made good use of our gantry-style CNC mill over the last few years. We’ve built all our robots to date with it. Recently we decided to augment our machining capability with a vertical CNC mill. Our current mill has been excellent for machining large flat parts out of sheet aluminum, but now we wanted to be able to machine parts that were deeper and more three dimensional, as well as use coolant and a greater variety of tools. After extensive research of all the various machines available, we decided on a Tormach 1100. We bought and installed the base Tormach machine, then extended it with various add-on kits and our own customizations to turn it into a lean, mean milling machine. We’ve only had the mill for about a month, but we love it so far. The Tormach’s capabilities, features, and price are geared toward professional machinists, small businesses, and prototype shops, so the Tormach isn’t affordable for most hobbyists, but it is an excellent machine. In future posts, we’ll show you some of the parts we’ve made, but for now, here are some details on our installation.
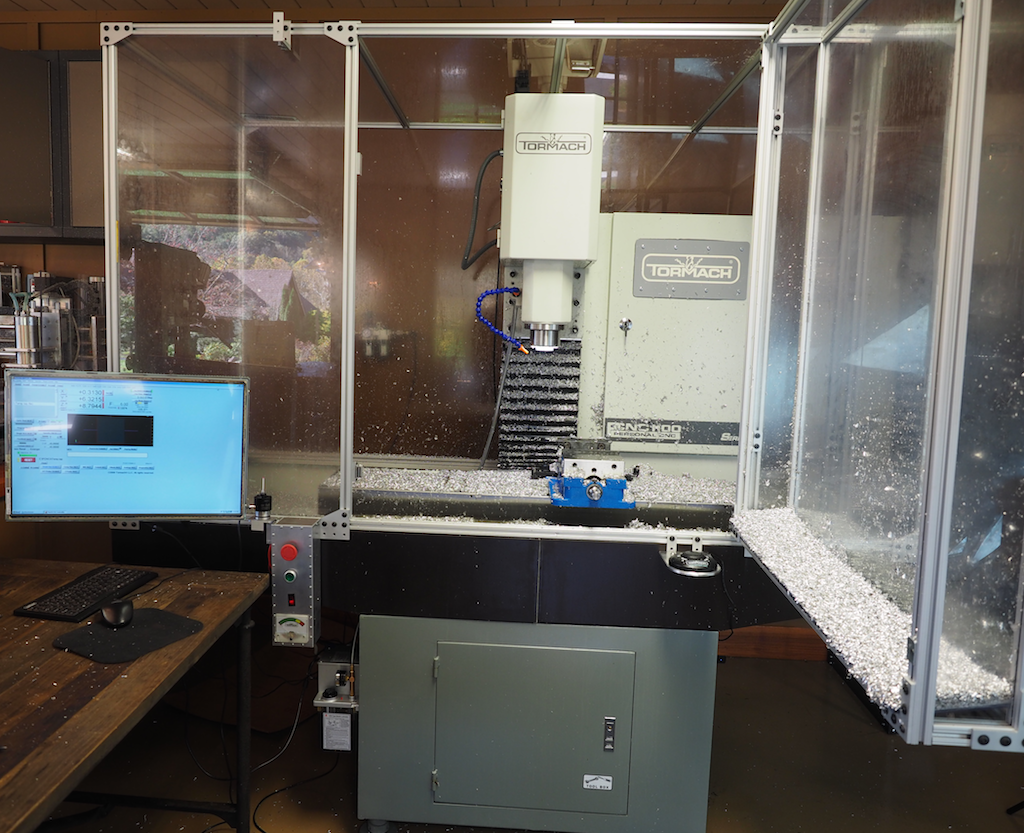
The base machine weighs 1130 pounds, so in addition to the mill itself, we purchased Tormach’s stand kit to make sure we supported the machine properly. The chip tray’s bright white color didn’t fit too well in our shop, so we painted it oil rubbed bronze (in case you were wondering why it doesn’t look like other Tormachs you’ve seen). We then constructed a full enclosure of our own design using 80/20 and 1/4” polycarbonate plates. The enclosure keeps the flood coolant and chips contained, reduces shop noise, and improves safety. Part way through the building of the enclosure we ran out of the metal plates and brackets we needed. It was late on a Friday night and it stopped our project dead in its tracks. No problem. We jumped on the CAD system, designed the parts, and machined them on the mill. Very cool.
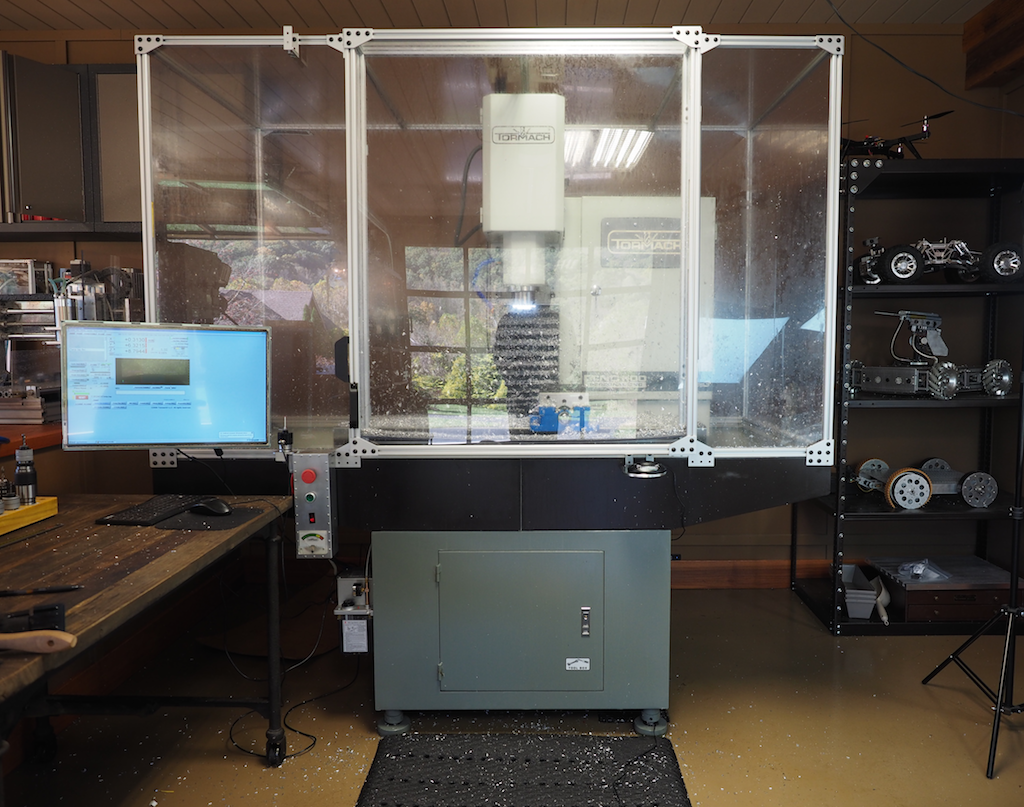
The control panel on a standard Tormach is located on the electrical box just to the right of the spindle, which put it inside the enclosure, so we rewired the electrical controls so that they were accessible from outside the enclosure. We also simplified the controls to just what we needed: Emergency Stop, Start, Computer Power Button, and Spindle Load Gauge. Everything else is controlled via the computer screen.
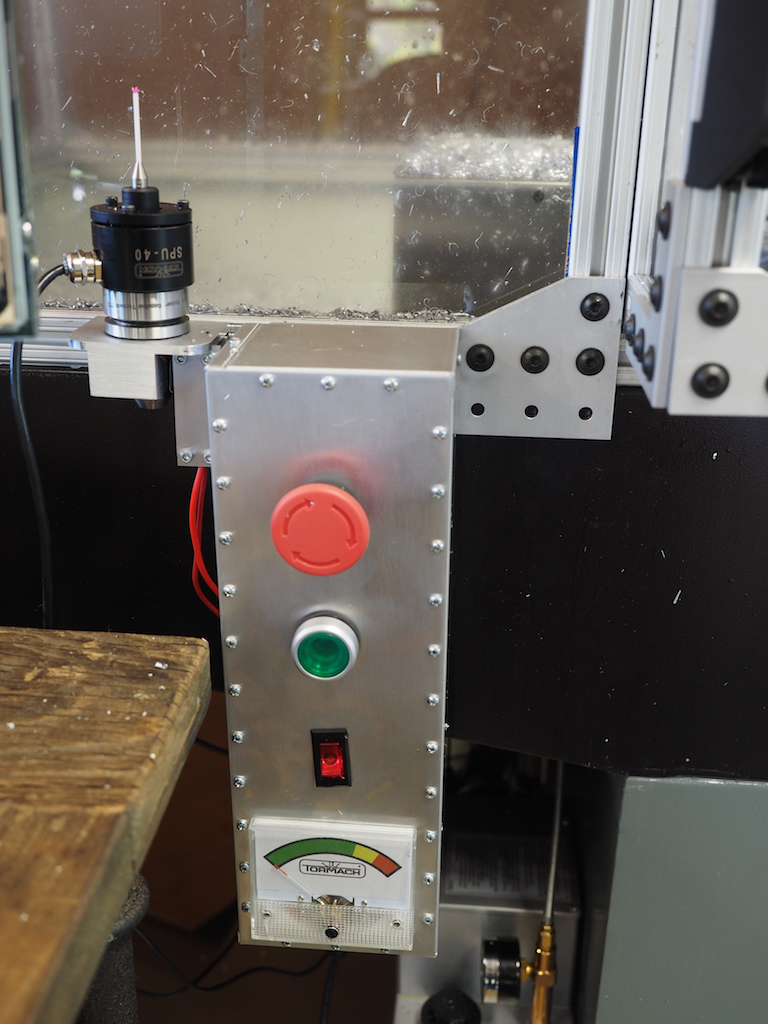
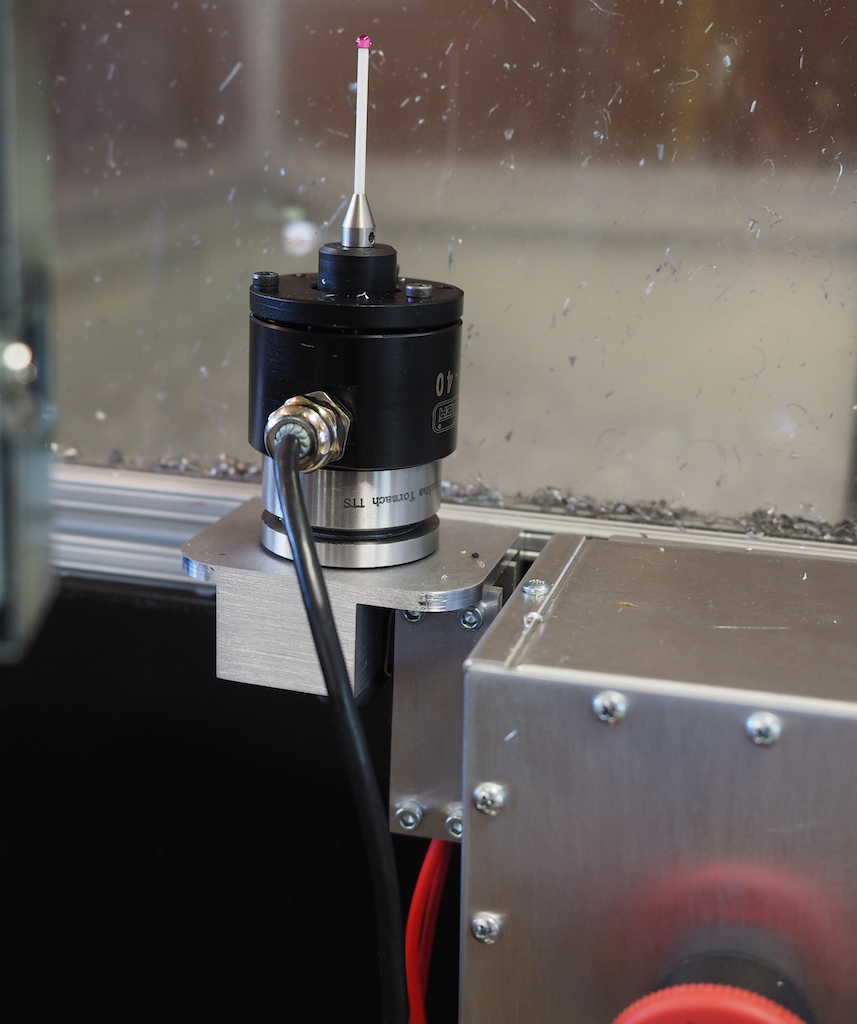
When we setup a part in the machine, we use an electronic touch probe, which allows us to find the X, Y, and Z position of the workpiece very precisely, which is critical to making good parts. We love using the probe, but the problem was that there is a bug in the Mach3 software’s probe wizard. In some cases, when you run the probe wizard, Mach3 turns on and spins the spindle, which yanks out the probe cable, whips it around at high speed, and destroys the probe. To make sure this never happened to us again, we wired the spindle power through a custom bracket we designed with a high-amp lever switch. When the probe is resting in the bracket, which is now its normal storage location, then the spindle will operate as usual. But when we pull the probe out and put it in the spindle for probing, the lever switch will cut power to the spindle so it can’t spin even if the buggy software tells it to. It was a really nice way to fool-proof and simplify the job setup procedure. [Important April 2015 UPDATE: Tormach now offers their new own, internally-developed Path Pilot software instead of Mach3. Path Pilot is a much better, more robust approach for running the Tormach. And best of all, this was a free upgrade to all previous Tormach owners!].
In the picture below, you can see the probe resting in the custom switch bracket we designed in SolidWorks and then machined on the Tormach.
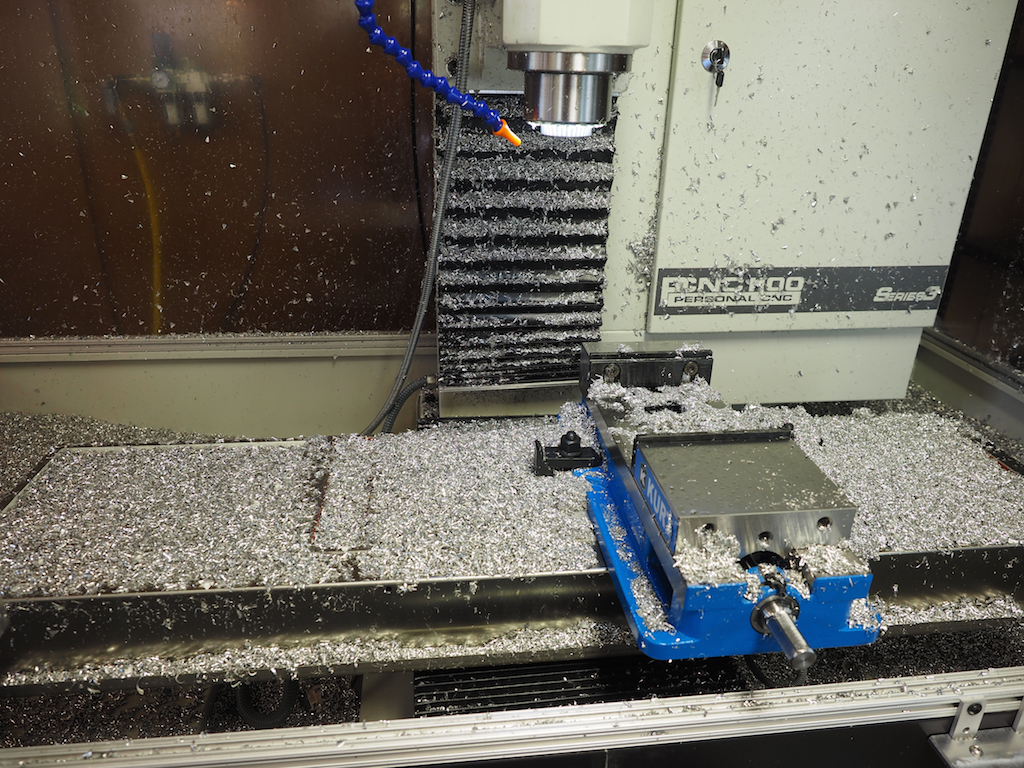
Clamping and fixturing is often the most time consuming and troublesome part of running a job, so we put significant time into figuring out the best approach for our particular situation. After studying all the different kinds of parts we plan to machine, we designed our fixturing system around a 6” Kurt Vise with quick-change SnapJaws. Our goal was to leave the vise in the machine for 95% of our jobs. One of the trickiest elements of building the enclosure was to make sure that the vise didn’t hit the enclosure wall during the machining operation. It’s hard to tell from the picture, but the large door on the front of the enclosure is actually extended out 5” from the rest of the enclosure in order to give the vise plenty of room when the table is moving. Here’s a picture of the Kurt vise mounted into place, where it was promptly buried beneath a mound of chips.
The mill with the enclosure door open.
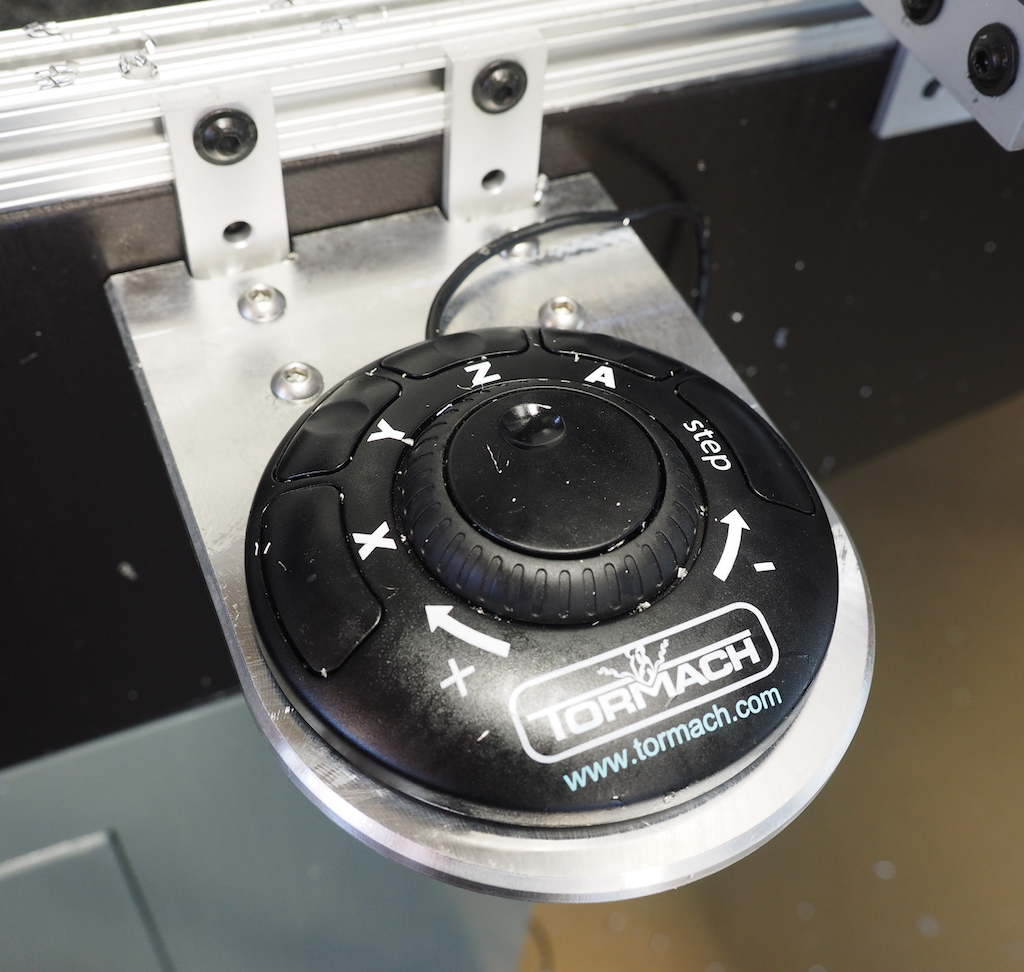
We also designed and machined a bracket shelf so that we could place the jog controller exactly where we wanted it, hovering on the right side just below the door so that we could use it whether the door was open or not.
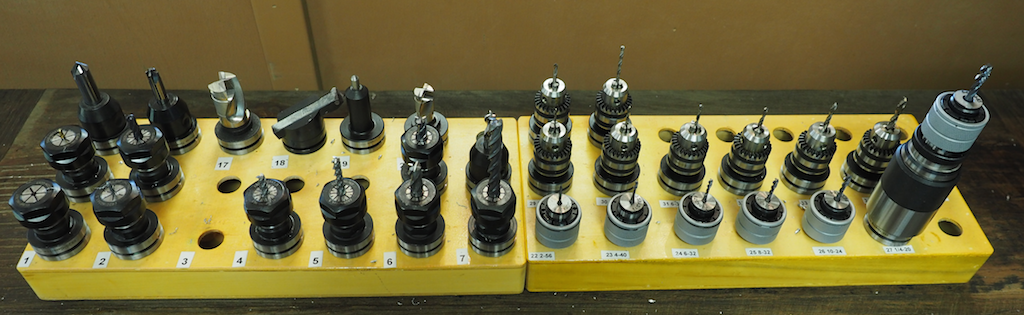
One of the best things about the Tormach is the Tormach Tooling System (TTS). It’s a well thought out approach to standardizing and simplifying tool heights so that mid-job tool changes are super fast and accurate. Here’s a picture of the tools and tool holders we have so far. The beauty of this system, especially when combined with the quick-change capability of Tormach’s compressed-air-powered drawbar option, is that you can change tools in a few seconds and be certain that the new tool is in the exact position it needs to be. This means that you can use the right tool for each portion of the job without worrying about changeover issues. Our tools include various sizes of end mills, chamfers, radius tools, modular insert mills, a fly cutter, engravers, drills, and taps. It has really expanded our capability.
We are looking forward to making many interesting parts with our new machine. I would like to thank the folks at Tormach for designing and building such an excellent mill, and for their email-based assistance when we had questions. I would also like to thank our friend and colleague Mike Dutra here in Asheville for his help during the installation process. His confidence with a 2-ton engine hoist moving around a 1130 pound hunk of iron was very helpful. He also helped out in many other areas of the installation process. Also, a special shout out to John over at CNC NYC. If you’re into machining, be sure to subscribe to his YouTube channel. Finally, I would like to give a nod to Camille and Genevieve who couldn’t wait to start using the machine. They started using it even before we had finished the enclosure (chips were a-flyin’ fast and far) and they have already proven themselves to be excellent machine operators. They’ve both made some great parts already and it’s just the beginning. We’ll keep you posted.

Great addition!
Great! I really want to have the same mill machine for my creations….~~
That is a pretty piece of hardware
Beautiful machine!
He,,
I think your progress thus far is amazing. I love your passion for manufacturin. I have written lots of code, for a number of years now and would love to help you guys out with any questions you might hav .
I certainly do not know everything but I to have a passion for making things better